This DIY belt is a cute accessory that’s super easy to make. Watch the video to learn how!
DIY Belt | Easy T-shirt Up-cycle
Featured
Reply
This DIY belt is a cute accessory that’s super easy to make. Watch the video to learn how!

Photo by Ljubomir Pavkovic
Fabric paint is a really great tool to work with, there are so many patterns and designs you can create to spruce up any piece of clothing. That’s why I was happy I had some on hand for these DIY paint print jeans.
I had put on these white jeans and I was about to head out when I noticed there were blue stains all over the back. I had accidentally stored them under a pair of dark wash jeans, so some of the blue dye had rubbed off on them, whoops! I was a bit upset that my white jeans were now ruined, but with a bit of thinking I knew I could DIY them into something new. Continue reading for the DIY below.

Photo by Ljubomir Pavkovic
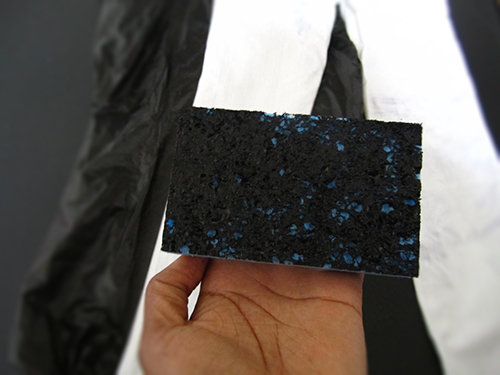
The Supplies

Jeans
Fabric Paint
A Tray
Sponge
Paint brush
Tape
2 Garbage bags
The Steps
Lay your pants on a flat surface, take a garbage bag and pull it through the pant leg (so that the paint doesn’t soak through to the other side), do the same for the other leg.
Put some fabric paint on the tray and dip the sponge into the paint. Take the brush and evenly distribute the paint onto the brush.
Take your sponge and press it paint-side down onto the pant starting from the bottom. Since the first application has fresh paint, press lightly and then gradually increase the pressure on the sponge.

Continue pressing the sponge down onto the pant until there is no more paint coming off the sponge.
Reapply paint to the sponge and evenly distribute with the brush. Again, press the sponge onto the pant.

Continue the last 2 steps until you’ve painted the front of the pants.

I decided I wanted to have a different colour around the pockets so I left the area unpainted. I added some pink paint to a brush and painted around the top part of the pockets.
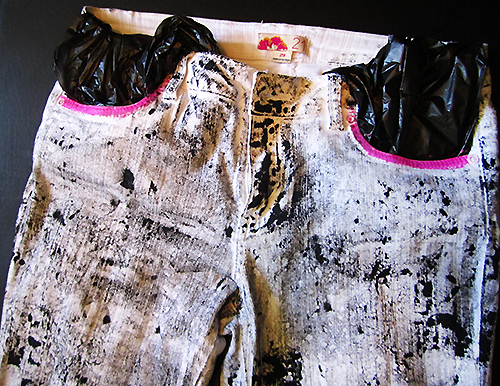
Let the paint dry completely. Flip the pants over and sponge paint the backside of the pants. If you would like to add a second colour to the back pockets like I did. Leave the area unpainted. Let the paint dry completely.
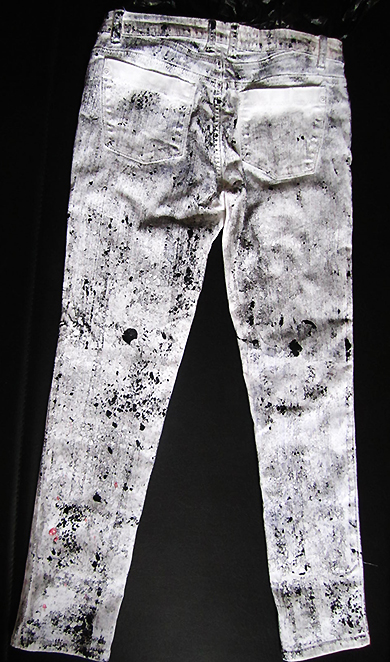
Add the tape across the back pockets and then tuck the garbage bags into the pockets. With the paint brush paint the second colour up to the tape line.
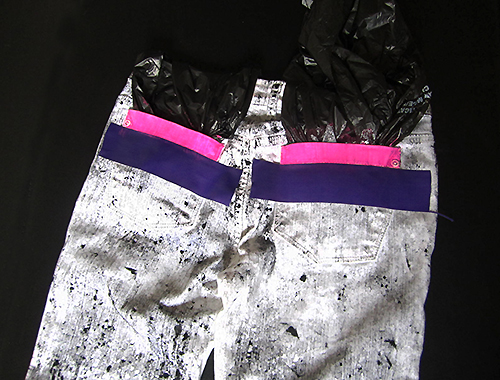
Let the paint dry and then remove the tape.

Voila, you’ve got yourself an almost new pair of pants.
-Shanel
Let’s Connect:
![]()
![]()
![]()
![]()
![]()
I channeled my inner goddess and decided to create a gold headband out of a belt. I had this gold link belt sitting in my closet for a while and I never quite found the right outfit to pair it with so it went unused, until now. A DIY gold headband is pretty simple and if you don’t have a link belt you can always substitute with a gold coloured chain.

Here’s how I did it.
The Supplies
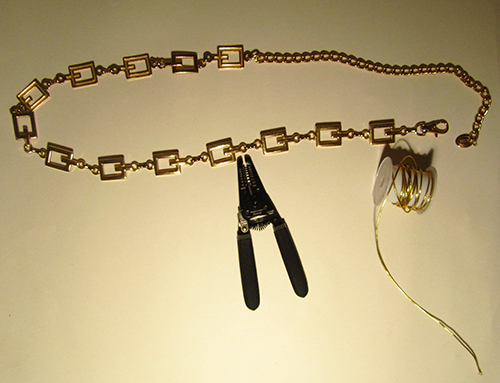
Wire cutters
Gold link belt or chain. If you are using a chain make sure the holes in the chain are big enough to fit the elastic through
Gold coloured elastic*
Scissors
Glue
*You can purchase from a fabric or craft store.
The Steps
I took the belt and measured it around my head. I left about 3 inches of space in the back for the elastic.
I used the wire cutters to cut the belt to the length I wanted.
Now it’s time to add the elastic. I looped the elastic through one end of the belt.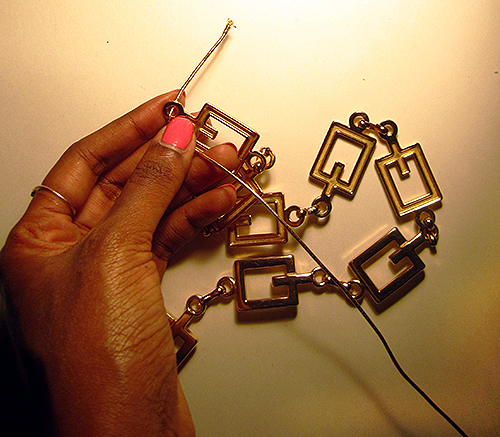
I looped the elastic all the way through so there were two sides. I measured the belt with the elastic around my head to ensure it fit comfortably. I then cut the elastic.

Where the loop began I tied a knot around one end of the belt.

To make the elastic stronger I began twisting it.
I twisted until both ends of the elastic had an inch left. I tied a knot to secure the twist making sure there was still space at the end of the elastic.

I tied the ends of the elastics around the other end of the belt and cut off the the excess. I added a dab of glue to secure the knot.

Voila!

-Shanel

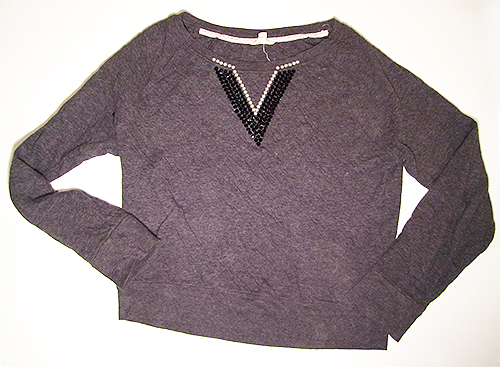
As winter quickly approaches I’m slowly entering a hibernation phase which has led to a lot of cleaning and organizing. I was going through my clothes when I realized I had FOUR plain grey sweaters that look almost identical, so it’s only natural that I had to DIY one. As I did some more cleaning of my craft stash l found a bunch of left over gems from this DIY Jewel Frame, and so this project was born.
I loved how this DIY sweater embellishment turned out. The supplies and steps are very minimal, but with different coloured embellishment and layouts you can create a really unique look.
The Supplies
2 Different coloured Gems
Fabric glue
A small Stick
A piece of scrap cardboard or bristol board

The Steps
Lay your sweater on a flat surface. So you don’t glue both sides of your sweater together, place the scrap material on the inside of your sweater.
Take your gems and layout your design. I tried a few before I decided on a “V” shape.
Begin gluing down your gems. Use the stick to press down on them.

Let it dry.

How do you like to add some sparkle & shine to your outfits?
-Shanel

Hello!
It’s been a while since I’ve written, but it feels good to be blogging again. During my break I visited New York City, celebrated my birthday and enjoyed the last warm days of summer hanging out with friends. I have to admit I fell out of habit and became unmotivated to write, but I did manage to create some new DIYs and I’m excited to share!
This DIY braided belt is a nice transition back into things because it’s easy to make, and it requires very few supplies. Read on to learn how to make it.

