This DIY belt is a cute accessory that’s super easy to make. Watch the video to learn how!
DIY Belt | Easy T-shirt Up-cycle
Featured
Reply
This DIY belt is a cute accessory that’s super easy to make. Watch the video to learn how!
Inspired by fall, these DIY leaf earrings are a great way to up cycle leather or material scraps. I really like how light they are, and you can make them in many colours!
Watch the video below to learn how to make your own DIY leaf earrings.
The Supplies
Leather scrap
Scissors
Jump rings
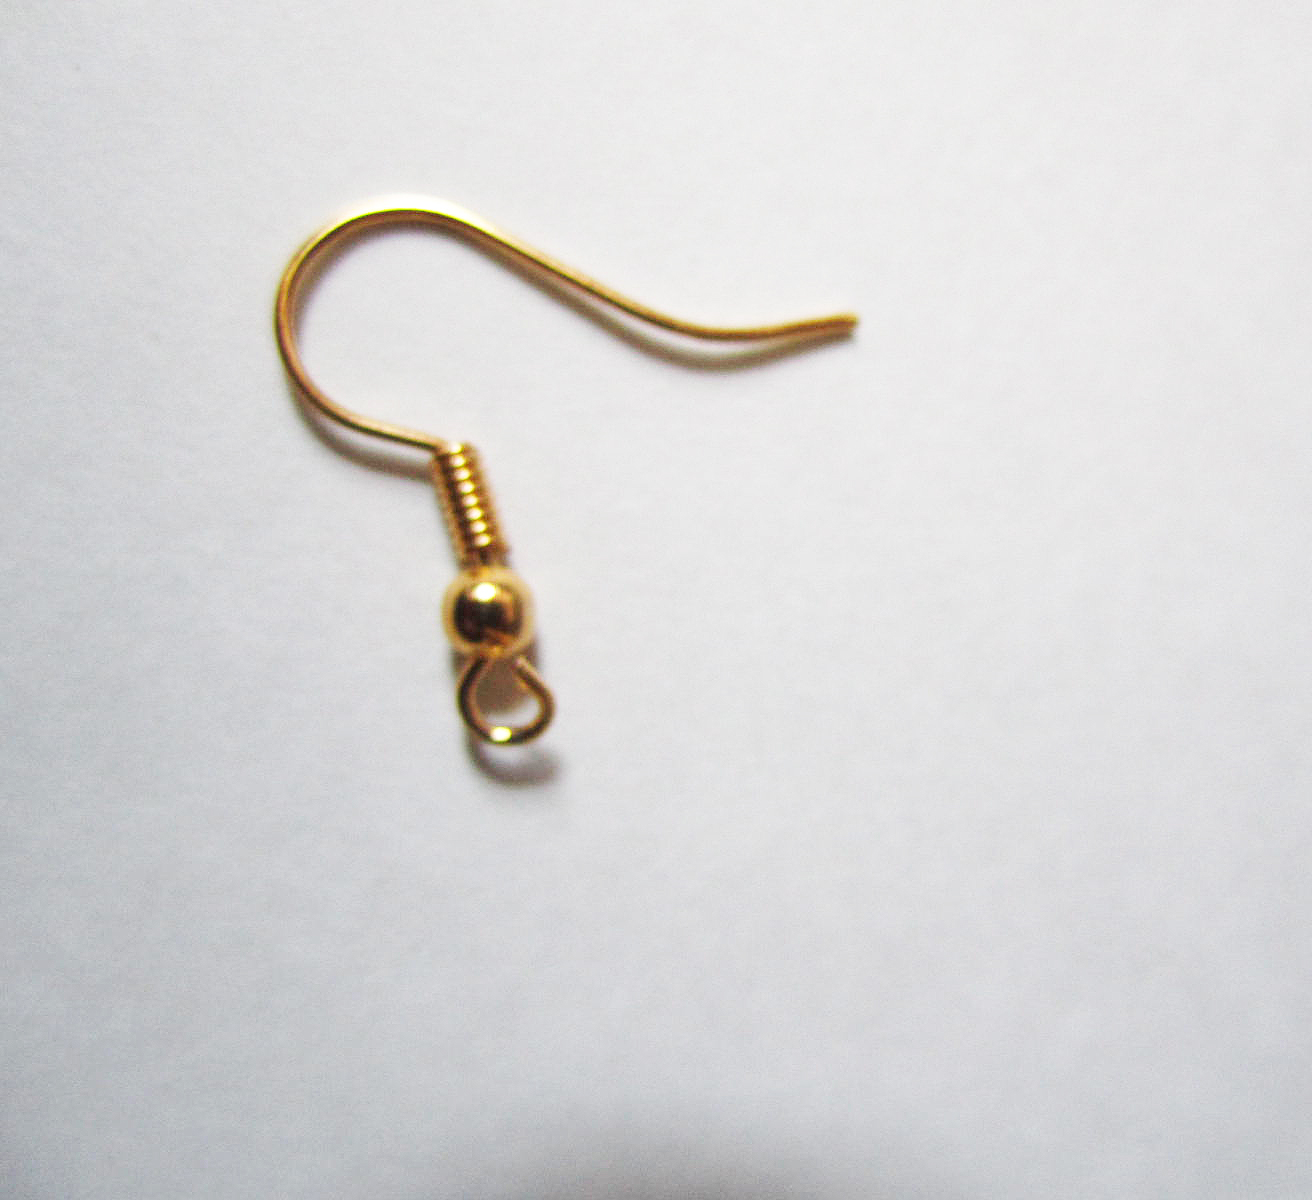
Fish eye earring hooks
Leather hole punch
The Steps
Take your leather piece and cut out the leaf shape
Use your first piece as an outline to cut out the second earring
To give the earring more detail I cut five small slits starting from the bottom moving upwards on each side of the earring. Repeat on the on the other earring
Take the leather hole punch and make a small hole at the top of the earring. Repeat on the other side
Open up your jump ring and put one jump ring through each of the holes
Add a fish eye earring hook to each jump ring
Close the jump rings
And you’re done!
I hope you fall for these earrings as much as I did!
![]()
This DIY Wrap Dress is super simple, and I love it because it can be worn so many different ways! You can layer it over an everyday outfit and wear it as a vest, or use it as a cover-up for the beach. Yay versatility! I plan on making more in a few different colours.
I decided to try something new and use Snapchat to record the tutorial, let me know what you think!
The Supplies
Stretchy fabric
Scissors
The Steps
Cut the material into a rectangle. The shorter the width of your material the shorter it will be on you.
Fold the material in half.
At the folded end about 4 inches from the top cut out a semi circle.
Open the material up and you’ll have a circle in the middle.
Put your arm through one side of the circle and then through the other side.
Wear however you like!
-Shanel

I have been doing a lot of reflection, contemplation and I’ve recently been dabbling into meditation and through all of this I’ve come to realize the importance of vision. The way I see it, vision is – taking the time to think about what is truly important to you and literally picturing “it”. “It” can be that event you want to happen, characteristics or habits you want to adapt, or whatever you would like to attract in your life.
You can apply vision for big goals or even minuscule things, for example I was tired of carrying my laptop in my purse so I decided I wanted a pleather or leather nap sack and I pictured it in my head. I went to Winners and sure enough I walked in and there was one pleather knapsack in the price range and style I wanted! That is just a small materialistic example but I have had other more significant events happen in my life where I envisioned them before they happened.
Visualization isn’t magic, you obviously also need to take action to make your visions come to life, but having a clear vision can help keep you on track to achieving your goals. A great way to be reminded about your visions or goals is through a vision board. There’s no “right” way to create your board but but continue reading for my tips on how to DIY your own vision board!
The Supplies*

A blank board or piece of paper
Magazines, some printed images, and text
Scissors
Glue, tape or pins
*You can also create a digital version of a vision board and save it as your desktop or phone background.
The Steps
Take a few deep breaths and think about why you are creating this vision board and it’s theme. If you don’t have a specific goal, event, or you’re not sure what you want, a good exercise is to take a piece of paper and write down “What do I want?” go with the flow and jot down whatever comes to mind. You can then base your vision board around your answers. I decided to create a vision board for the things I want and the habits I want to adapt for 2016. You can create a vision board for a shorter period of time or specific events or goals.

Gather images and text from magazines, the Internet, or photos you already have. These images should inspire, motivate, and make you feel good.

Cut out the images and arrange them on your board. Once your happy with the layout glue, pin, or tape them down. I personally like to have a bit of space between images.

Lastly, leave your vision board in a place where you can see it clearly so you can briefly take time to remember and reflect on your visions.
What are some goals you would like to achieve this year?
A big thank you to Emilie from Facade for snapping these pics!
– Shanel
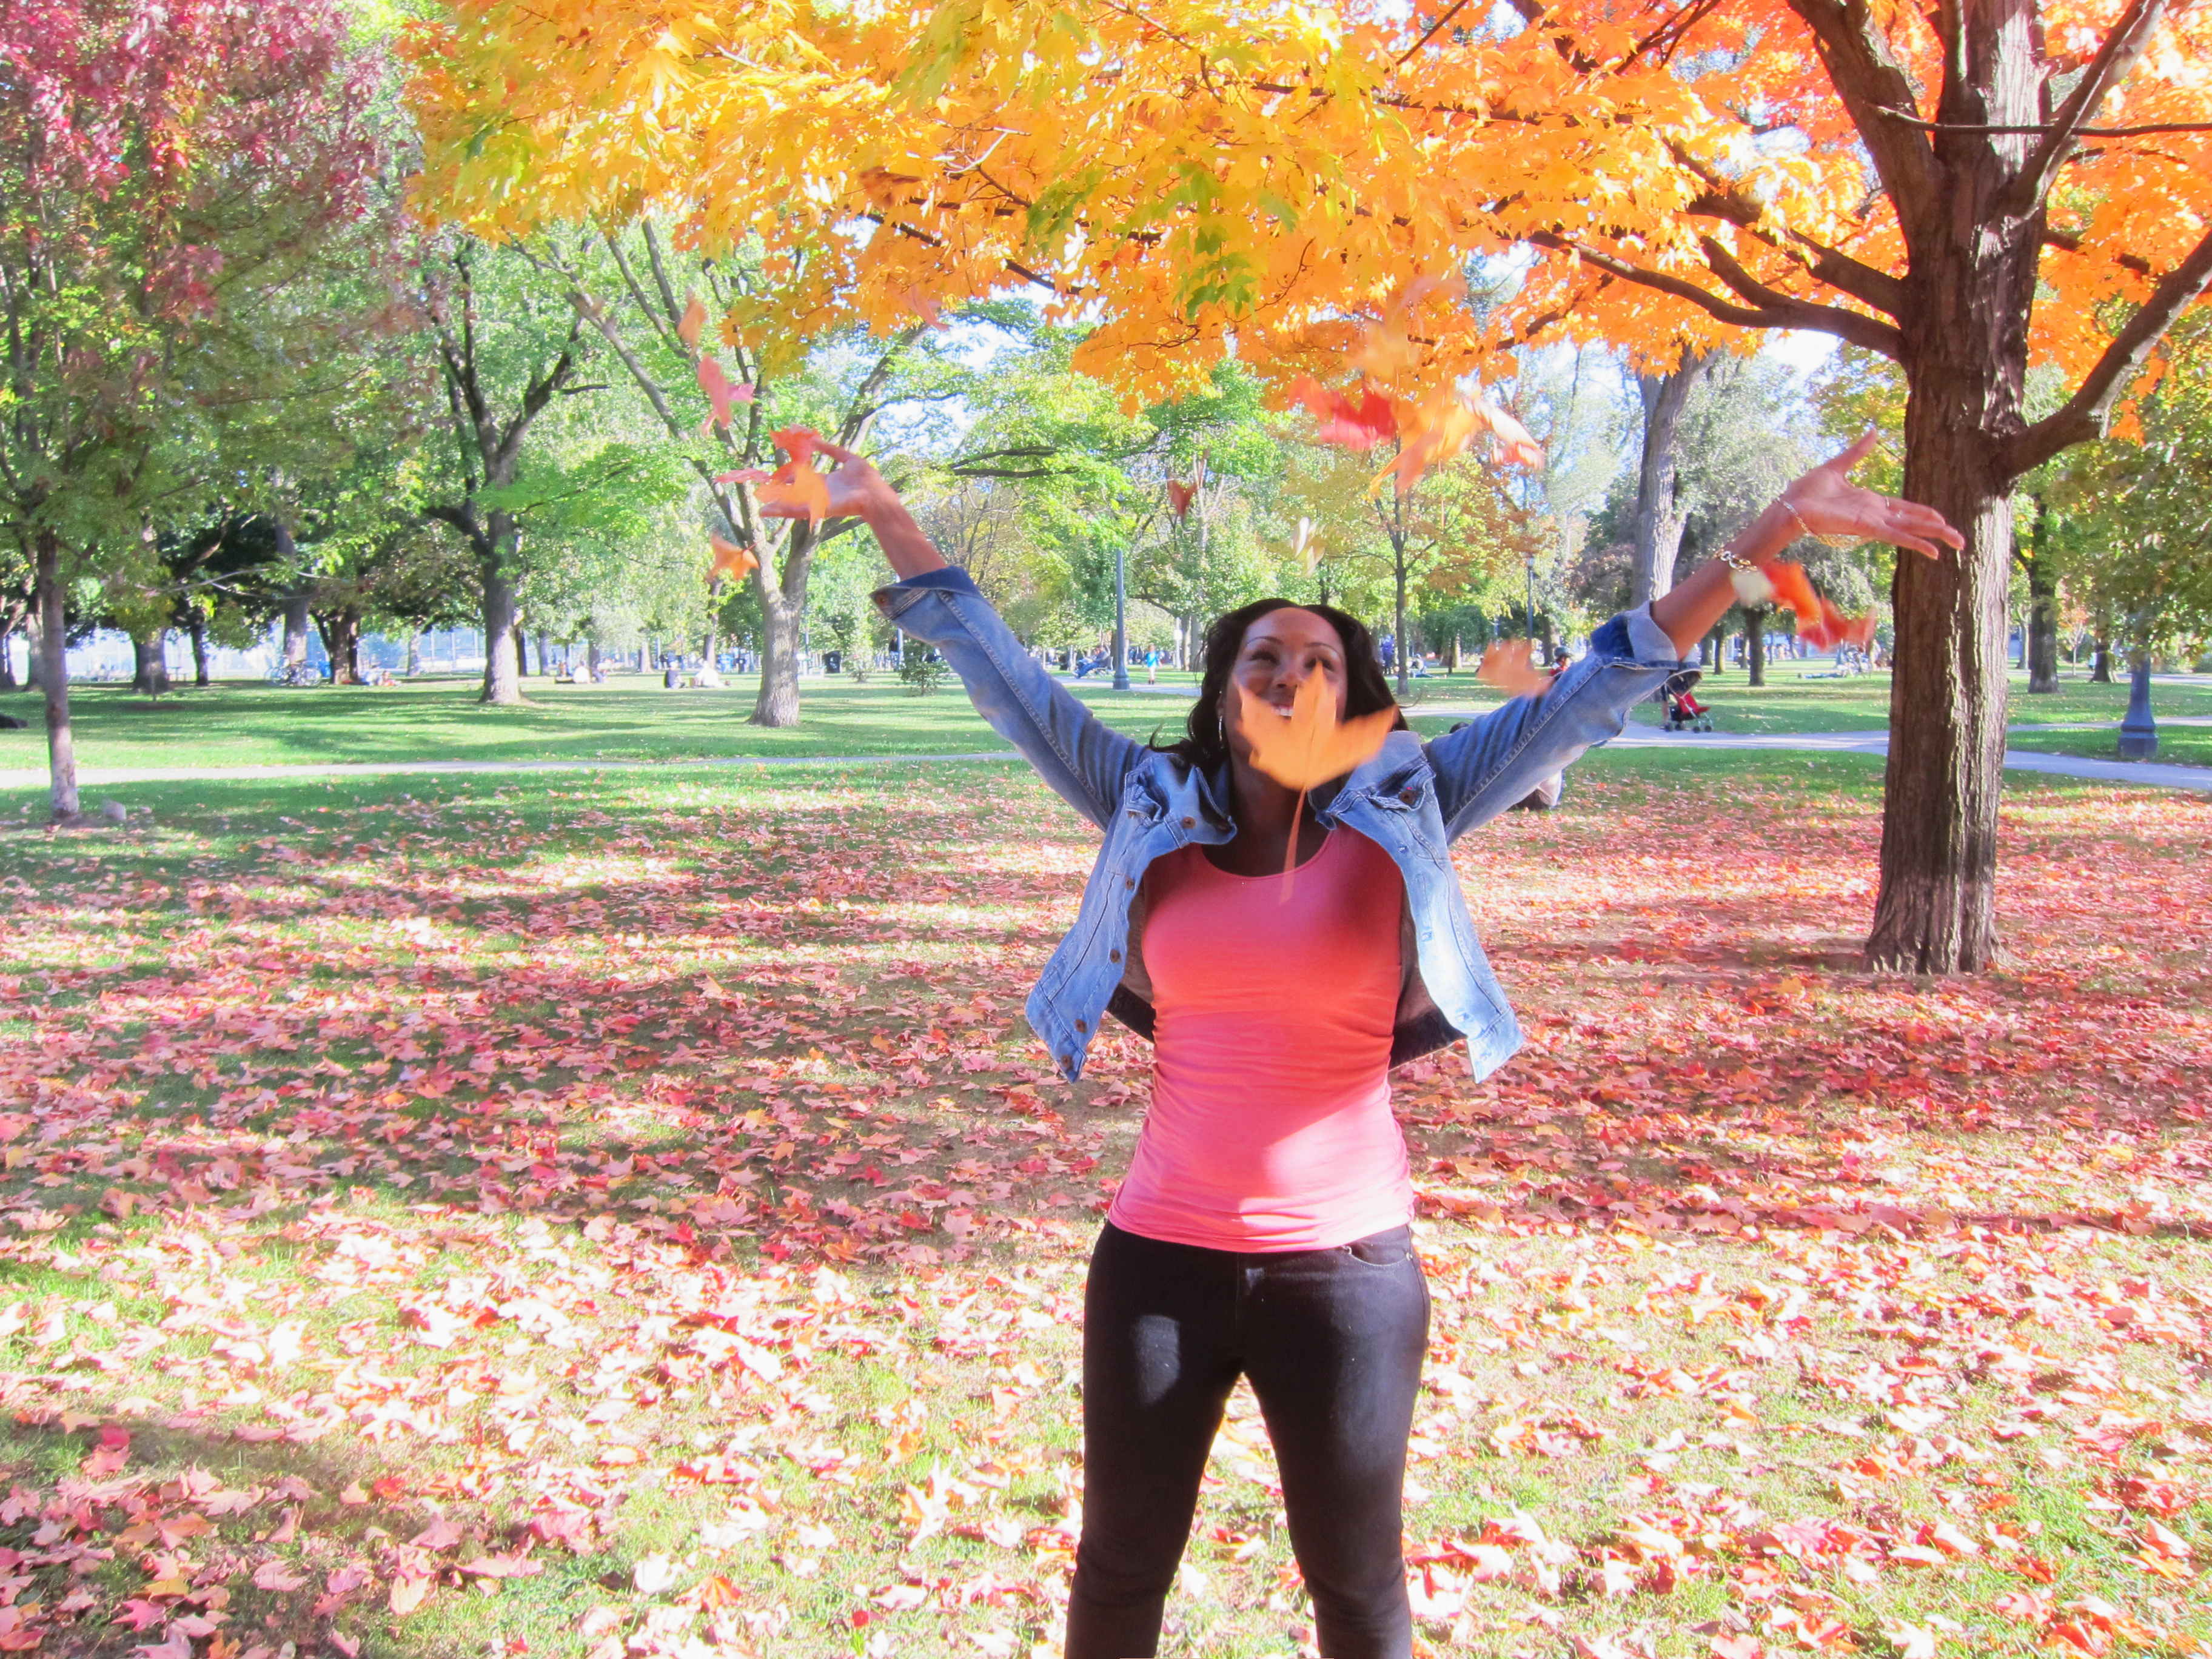
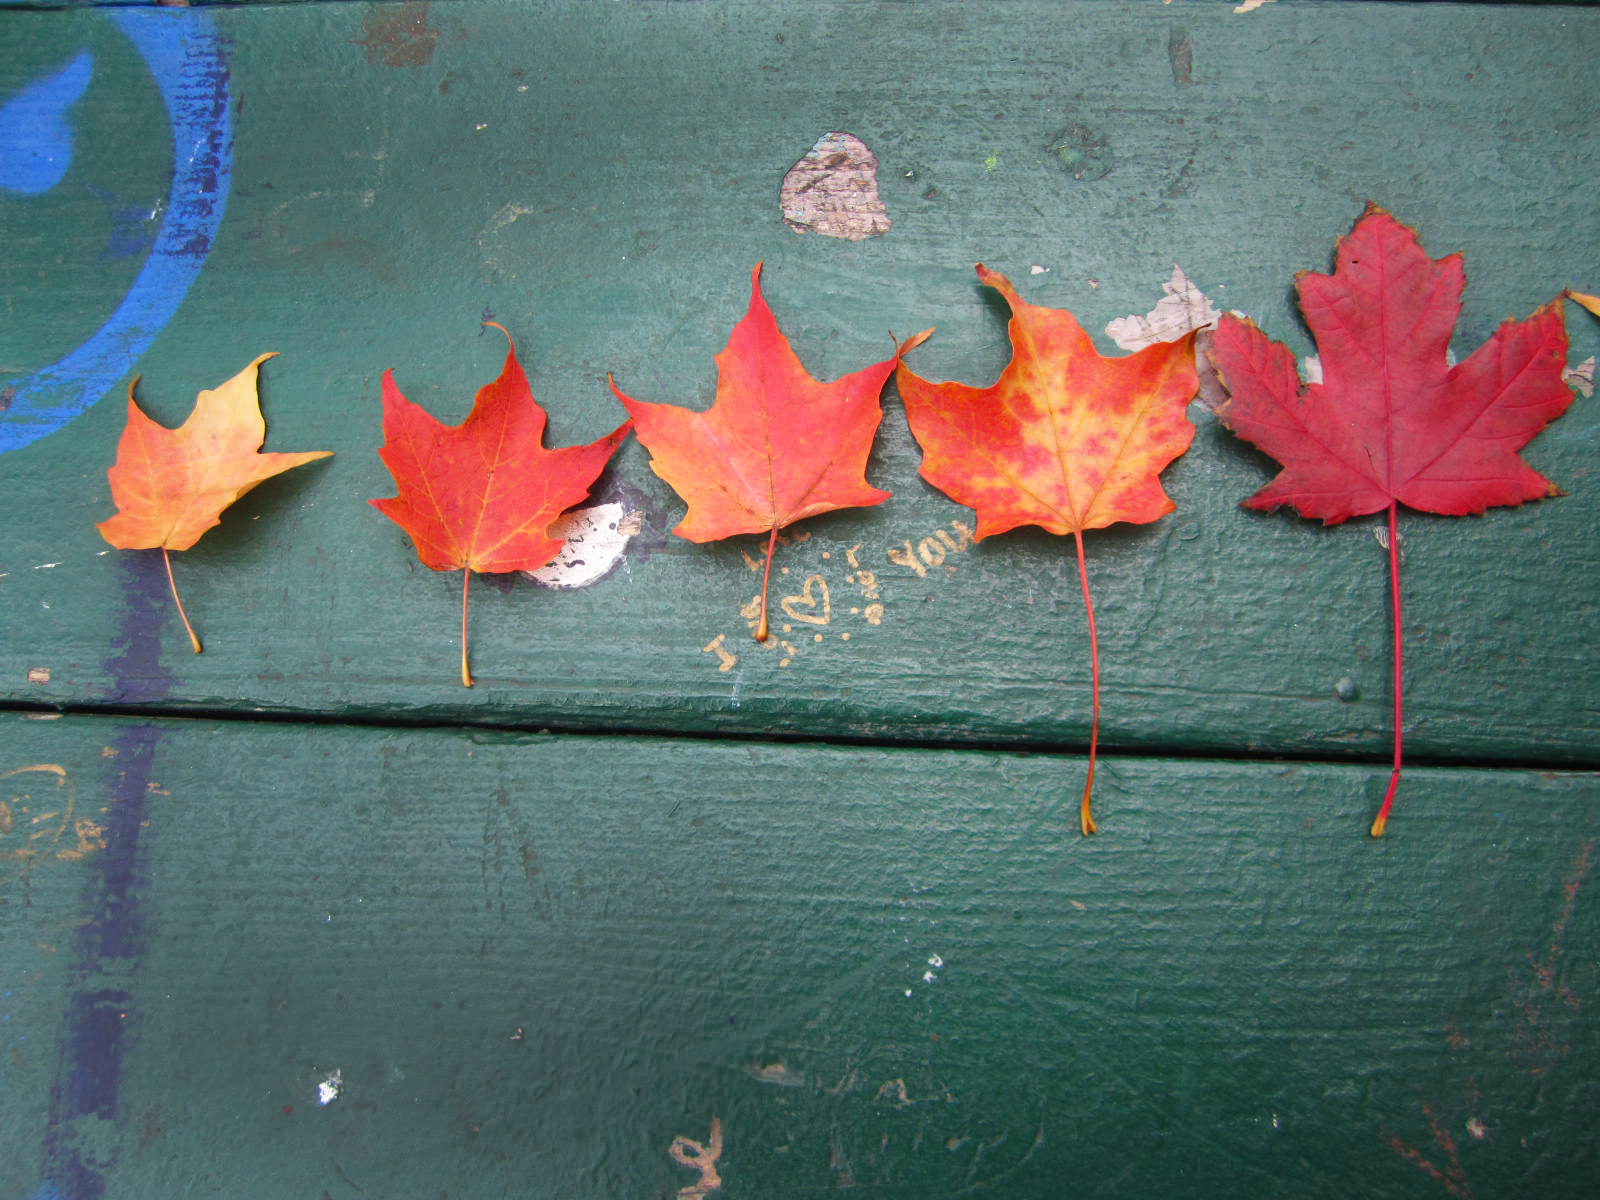
 Fall has always been my favourite season, it’s so scenic. I love walking down the street admiring all the beautiful changing colours of the trees, and suddenly a gust of wind blows and the leaves surround me falling delicately to my feet. It makes me happy just thinking about it.

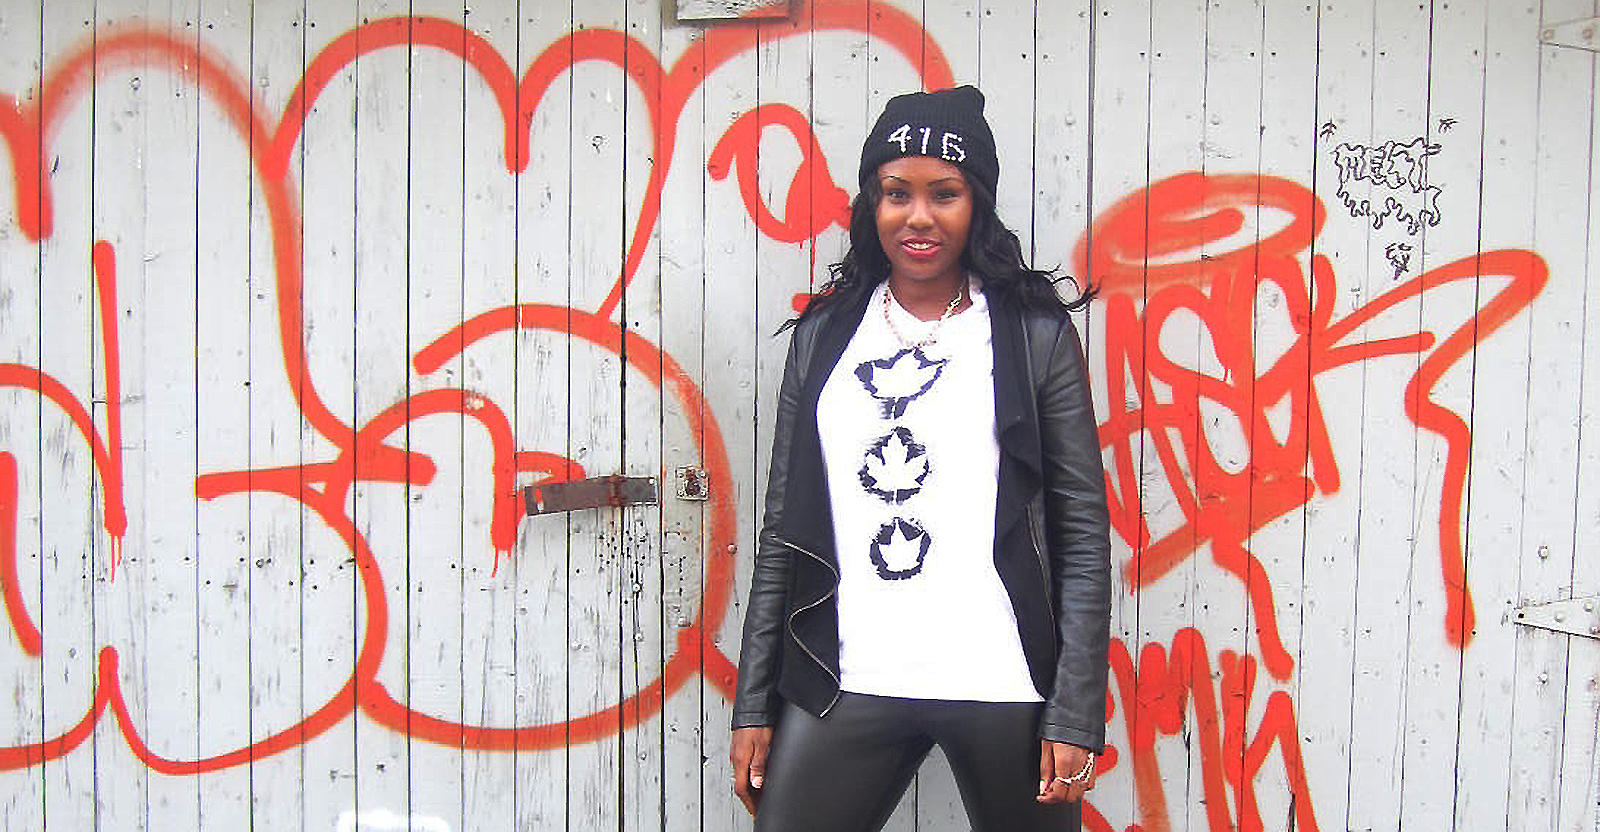
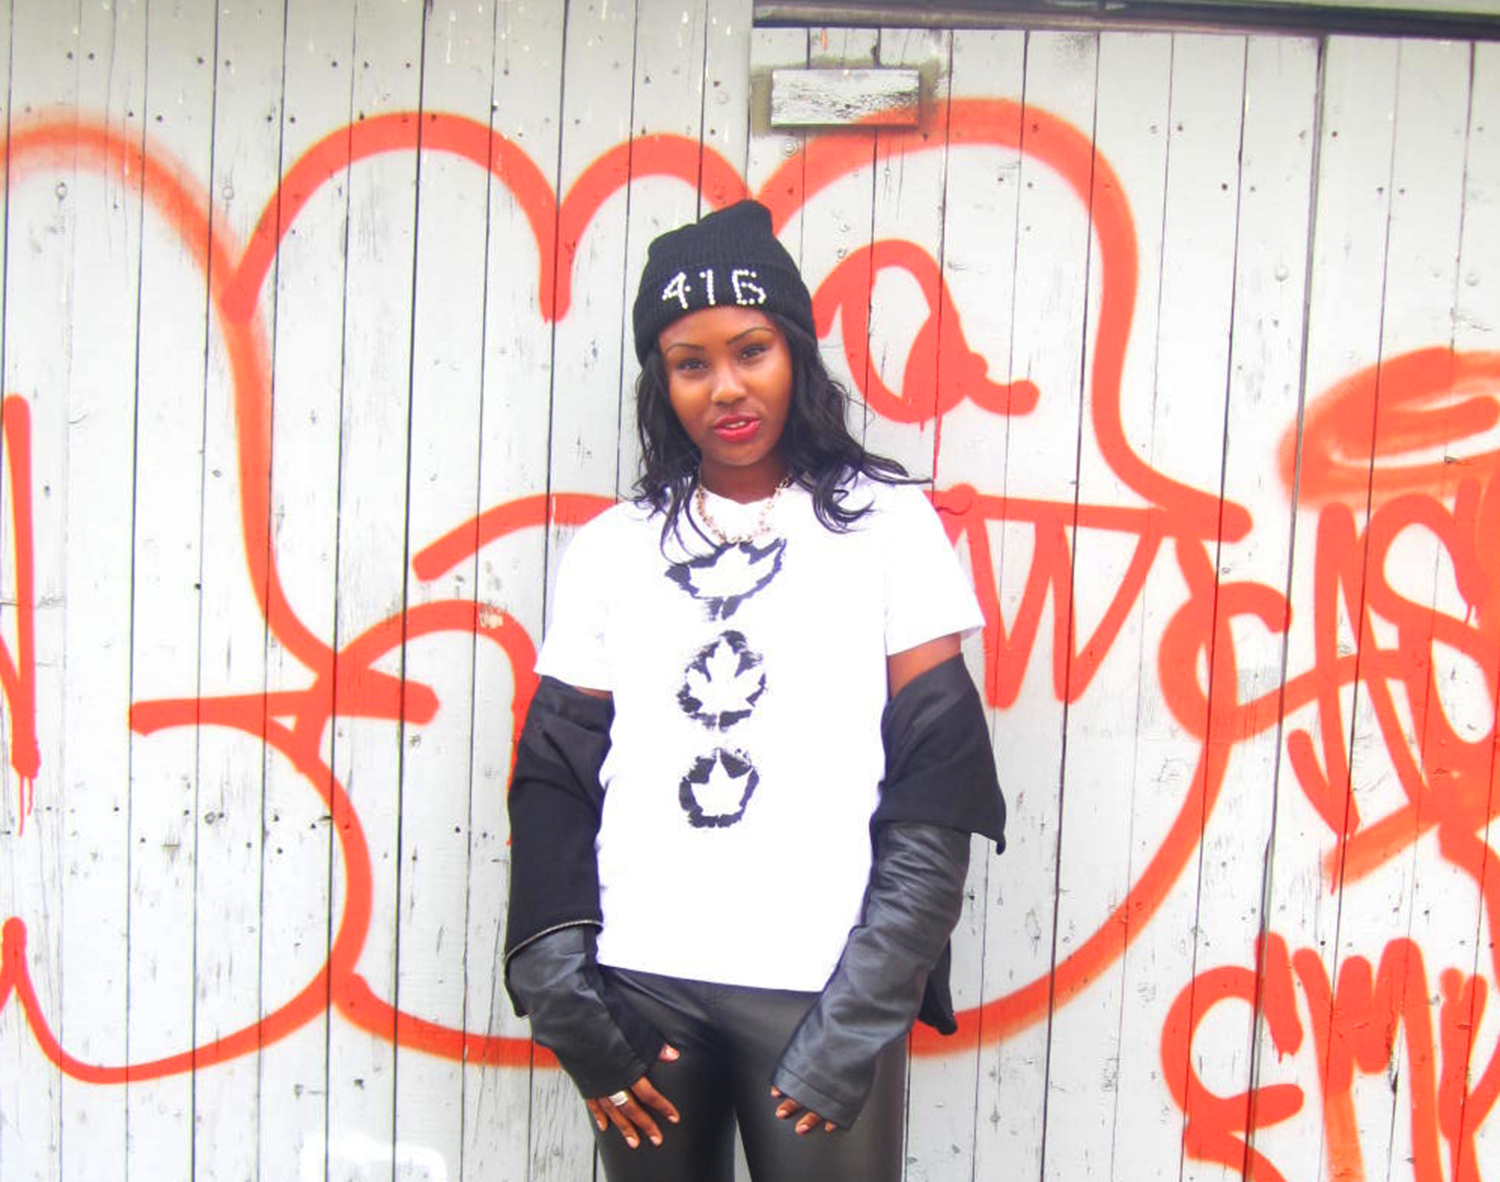
This leaf print DIY shirt is a great way to enjoy fall and all it’s beauty, and as a Canadian it made me feel a bit patriotic with the maple leaf being a part of our flag.

The inspiration for this DIY came to me when I attended one of my favorite events, Friday Night Live at the ROM. FNL has returned (another reason why I love fall!) and it runs until November 27th. Every FNL has a theme and last weeks was Thank You Canada. As a sponsor of the event Ford provides fun costumes and props that go along with each weeks theme. My friend Justine and I had a blast dressing up in “Canadian attire” and throwing leaves around. This Fridays theme is Dig it! It’s all about archaeology you can check the FNL event schedule here.
 Justine & I having fun at #FNL
Continue reading for the DIY
The Supplies

A Shirt
Leaves
Fabric Paint
A Paint brush
Piece of cardboard
A tray
The Steps
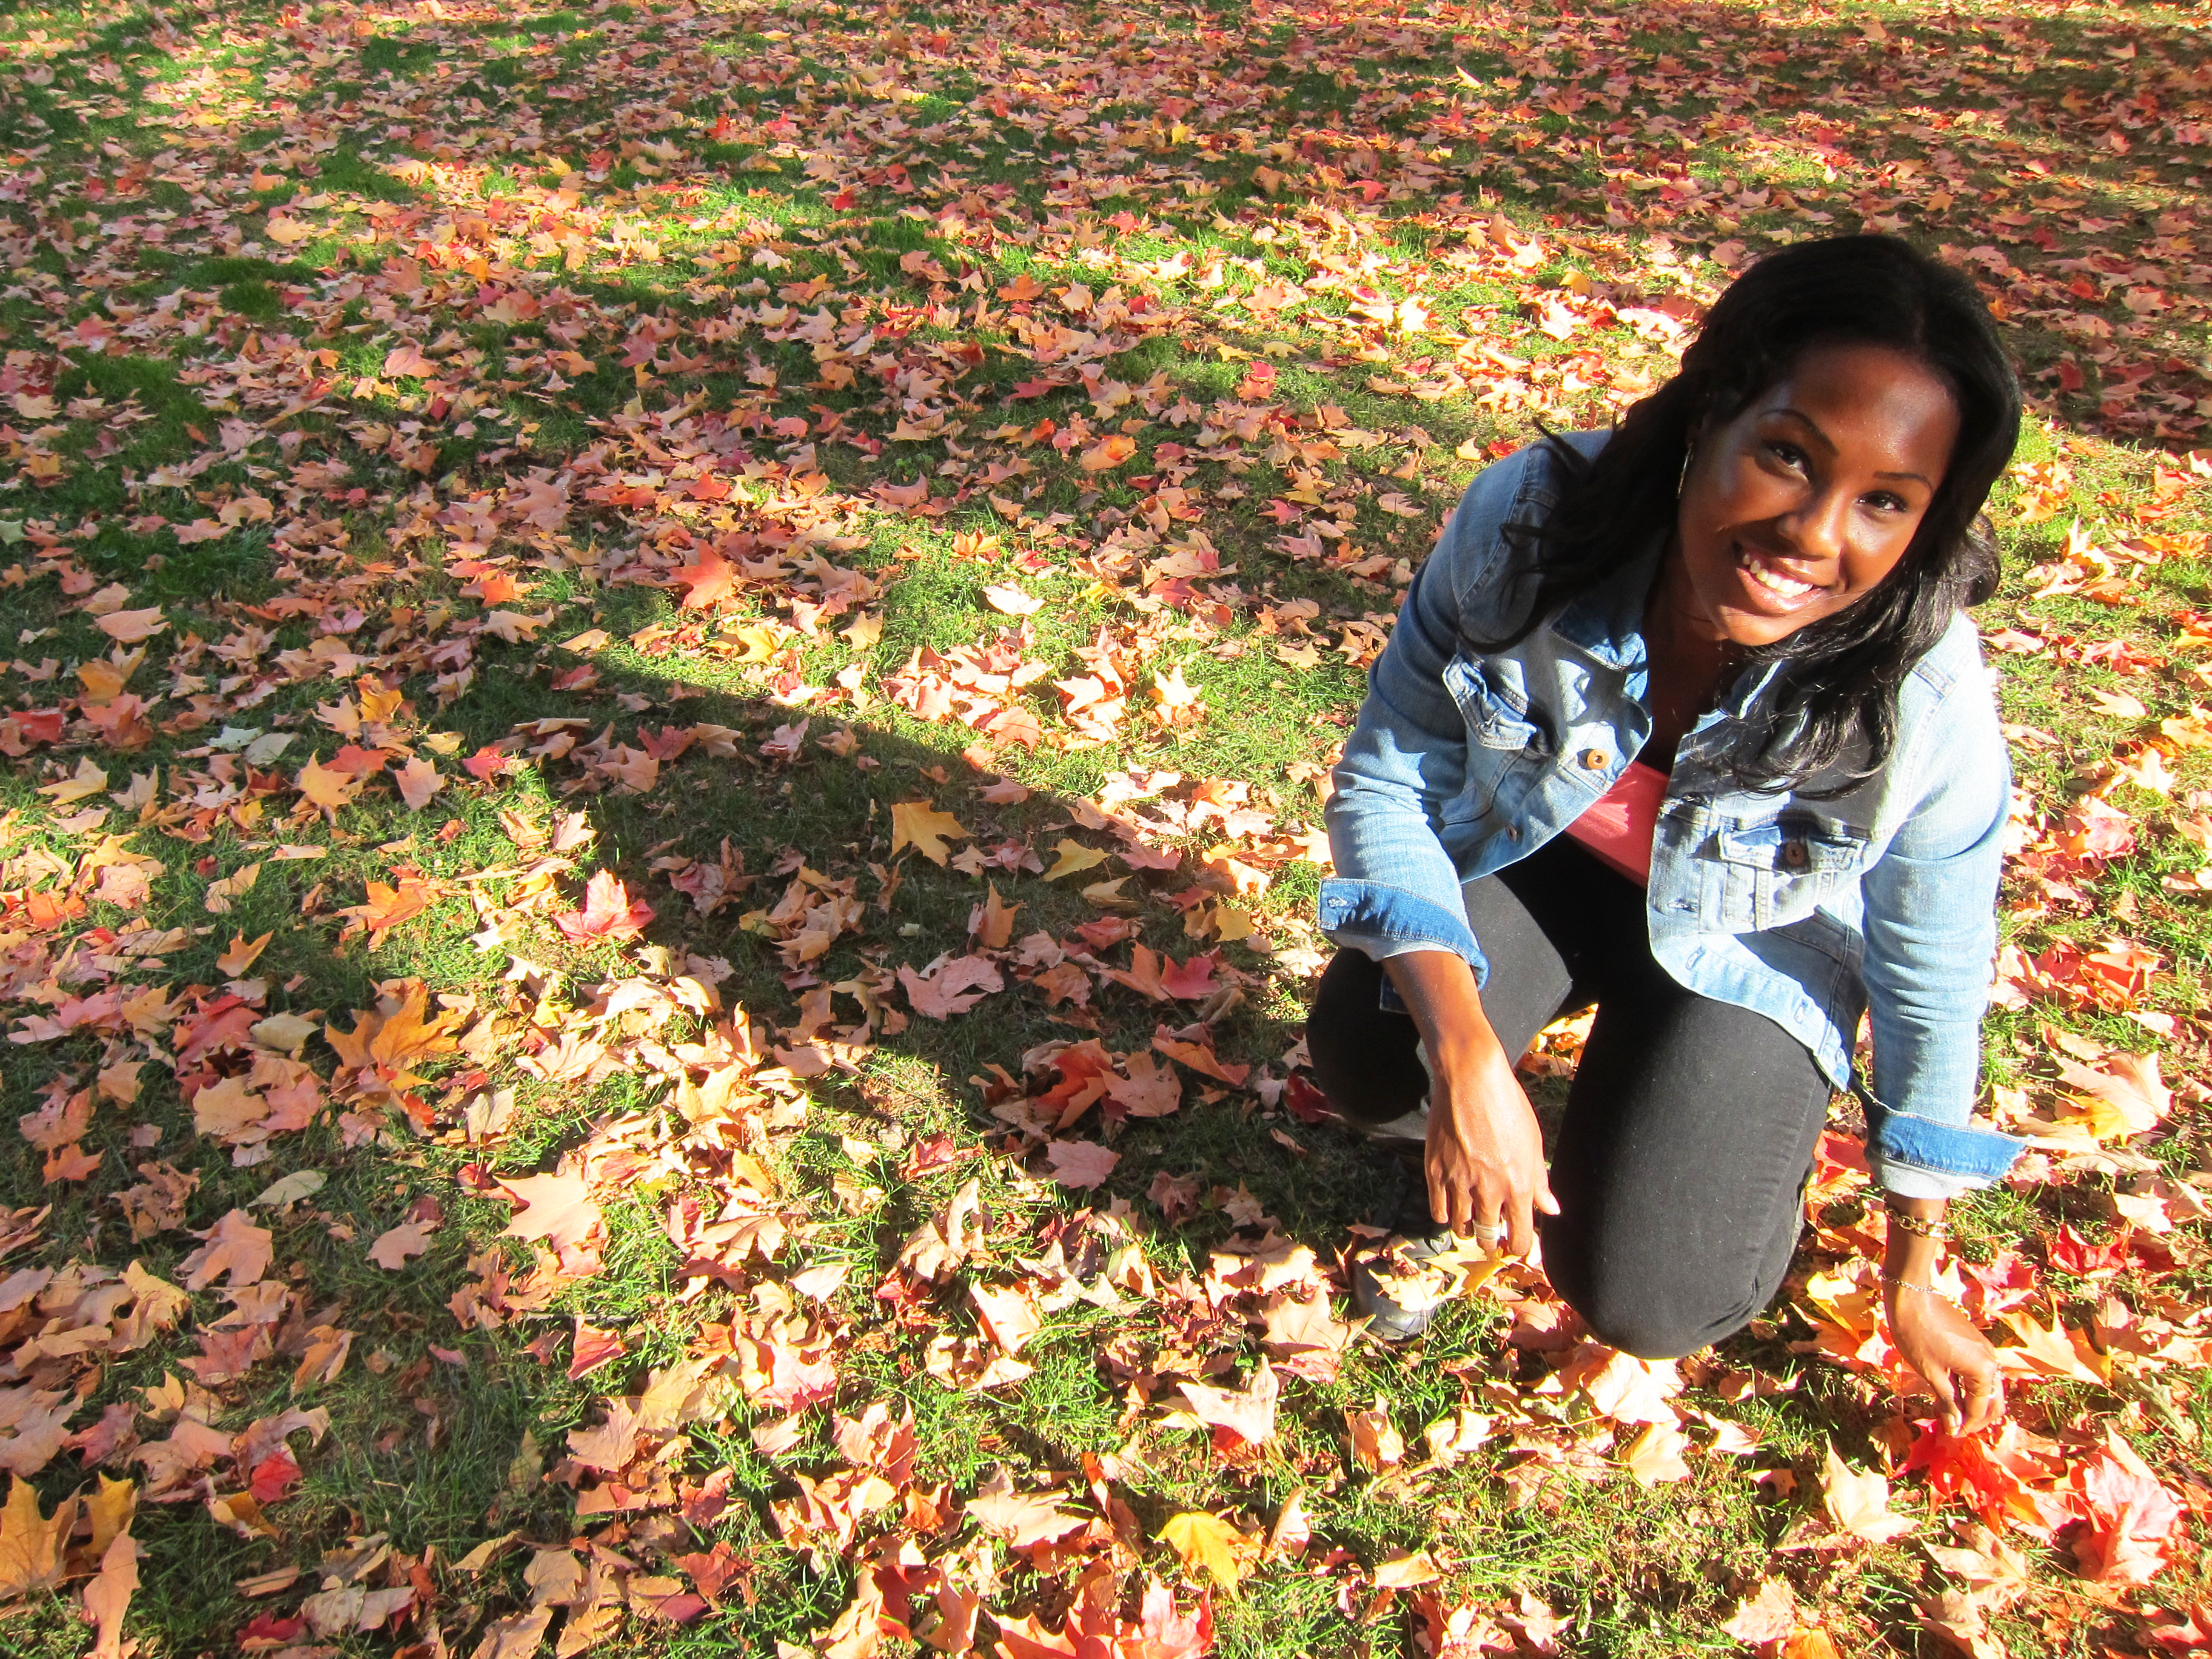
The first thing you will need to do is collect some leaves of varying sizes. This was a lot of fun! I went to a park named Trinity Bellwoods and found some leaves that had just fallen off the trees. The fresher the leaf the better, don’t collect the dried leaves as they are more prone to cracking and breaking when you paint them.
If you’re not going to do the DIY within a few days, store the leaves in a zip lock bag and keep them in a book so they don’t dry out and they will be nice and flat when you’re ready to use them.
Put the piece of cardboard inside the shirt, so the paint doesn’t seep through to the other side.
Layout the leaves on the shirt from largest to smallest, or whichever way you prefer.

Pour some paint onto a tray and dip the paint brush in. Hold the leaf in the middle and paint all around the edge of the leaf.

Repeat for the other leaves.

Remove the leaves and let the paint dry, and voila you’re done!


Accessories and jewelry are my favorite thing to DIY, so I’m happy to share this DIY chain cuff earring! I was looking for some inspiration when I came across these DIY ear cuffs. I thought they were pretty neat because you can wear them anywhere on your ear, even if they are not pierced. I practiced making a few cuffs when I decided I wanted to glam it up, so I tried adding some chain. I love the way they turned out.
Continue reading for the DIY.
The Supplies

A ruler
Crafting wire I used 20 gauge wire
Round nose pliers
Flat nose pliers
Chain
Earring hooks
Scissors
The Steps
Cut a 2 inch piece of of crafting wire, bend the wire in half. Repeat.

Cut 2 pieces of 11 inches of chain.
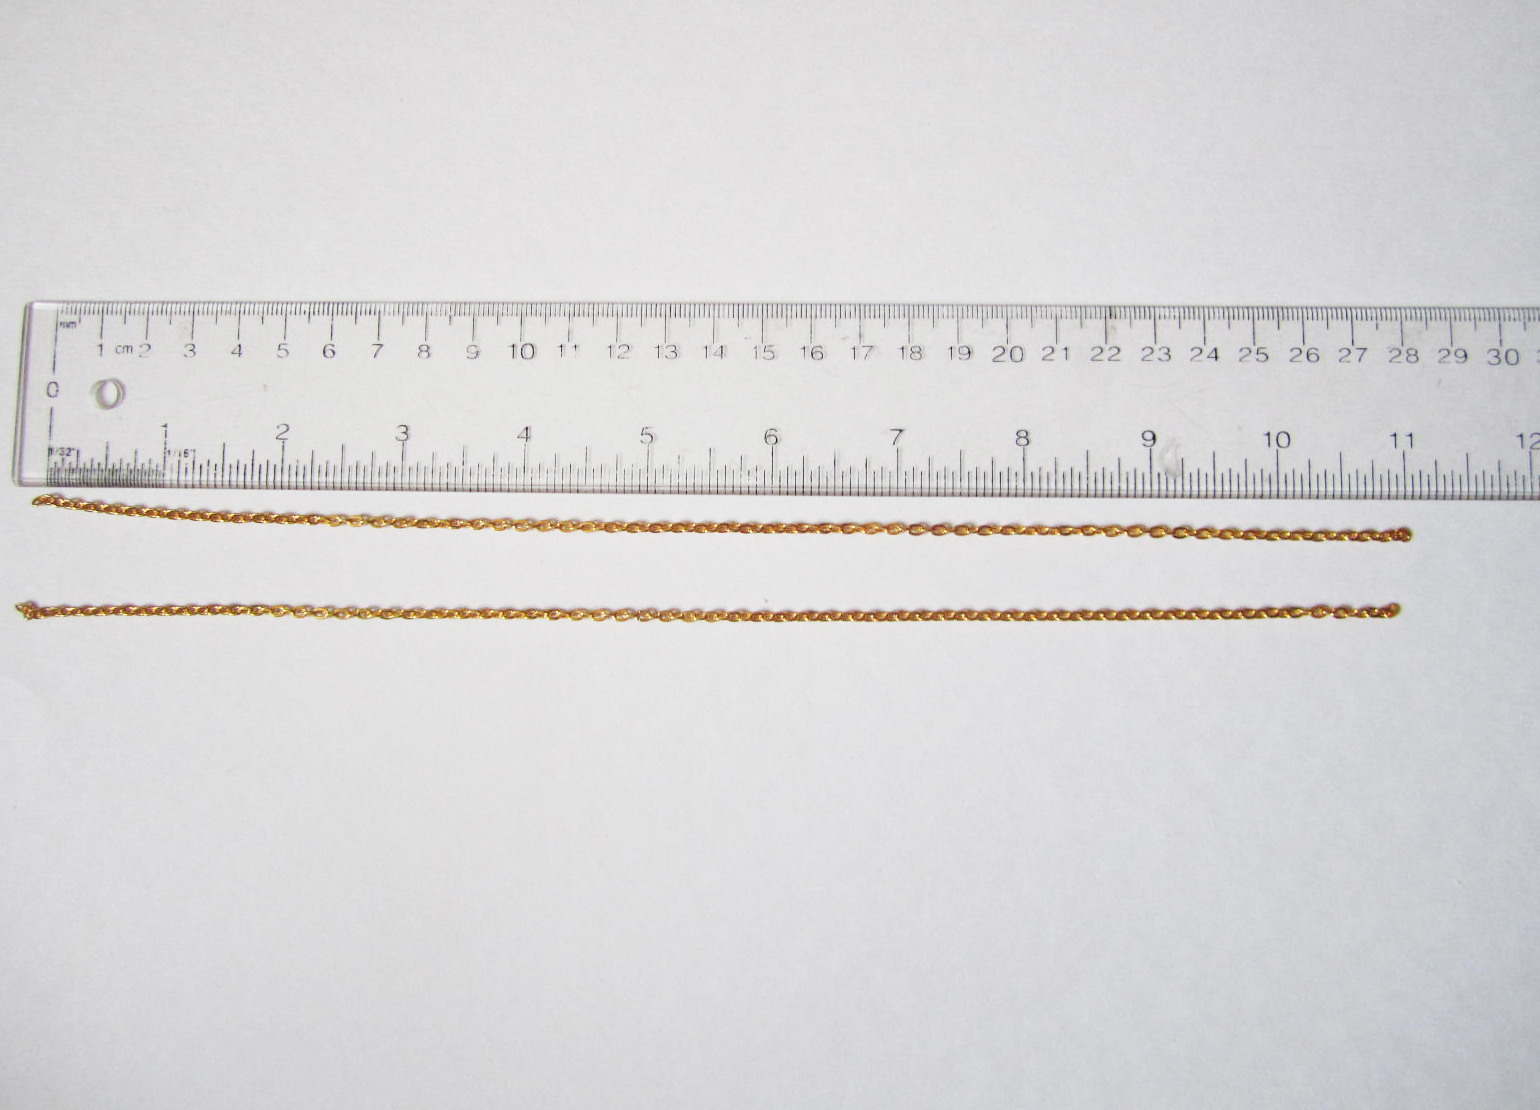
At the 5 inch point of the chain push the bent wire through. Repeat with the other piece of chain.
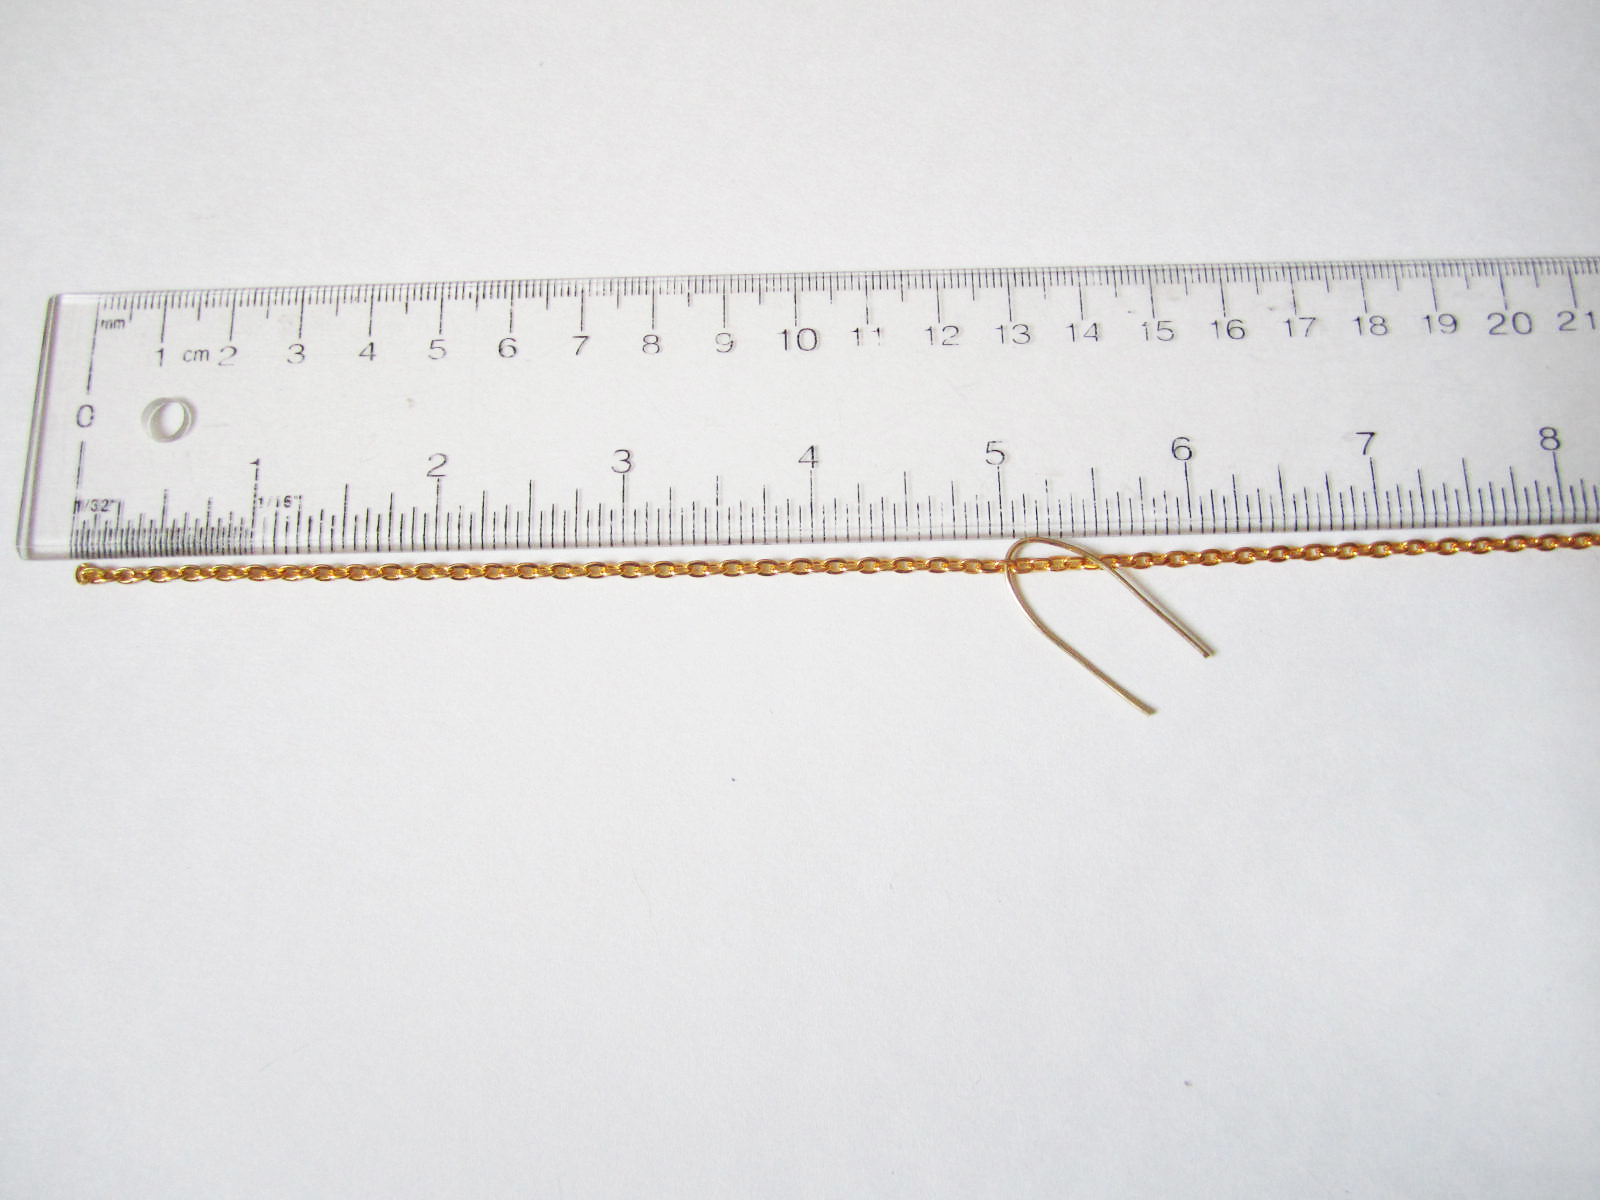
You should have two uneven pieces of chain hanging from the wire.
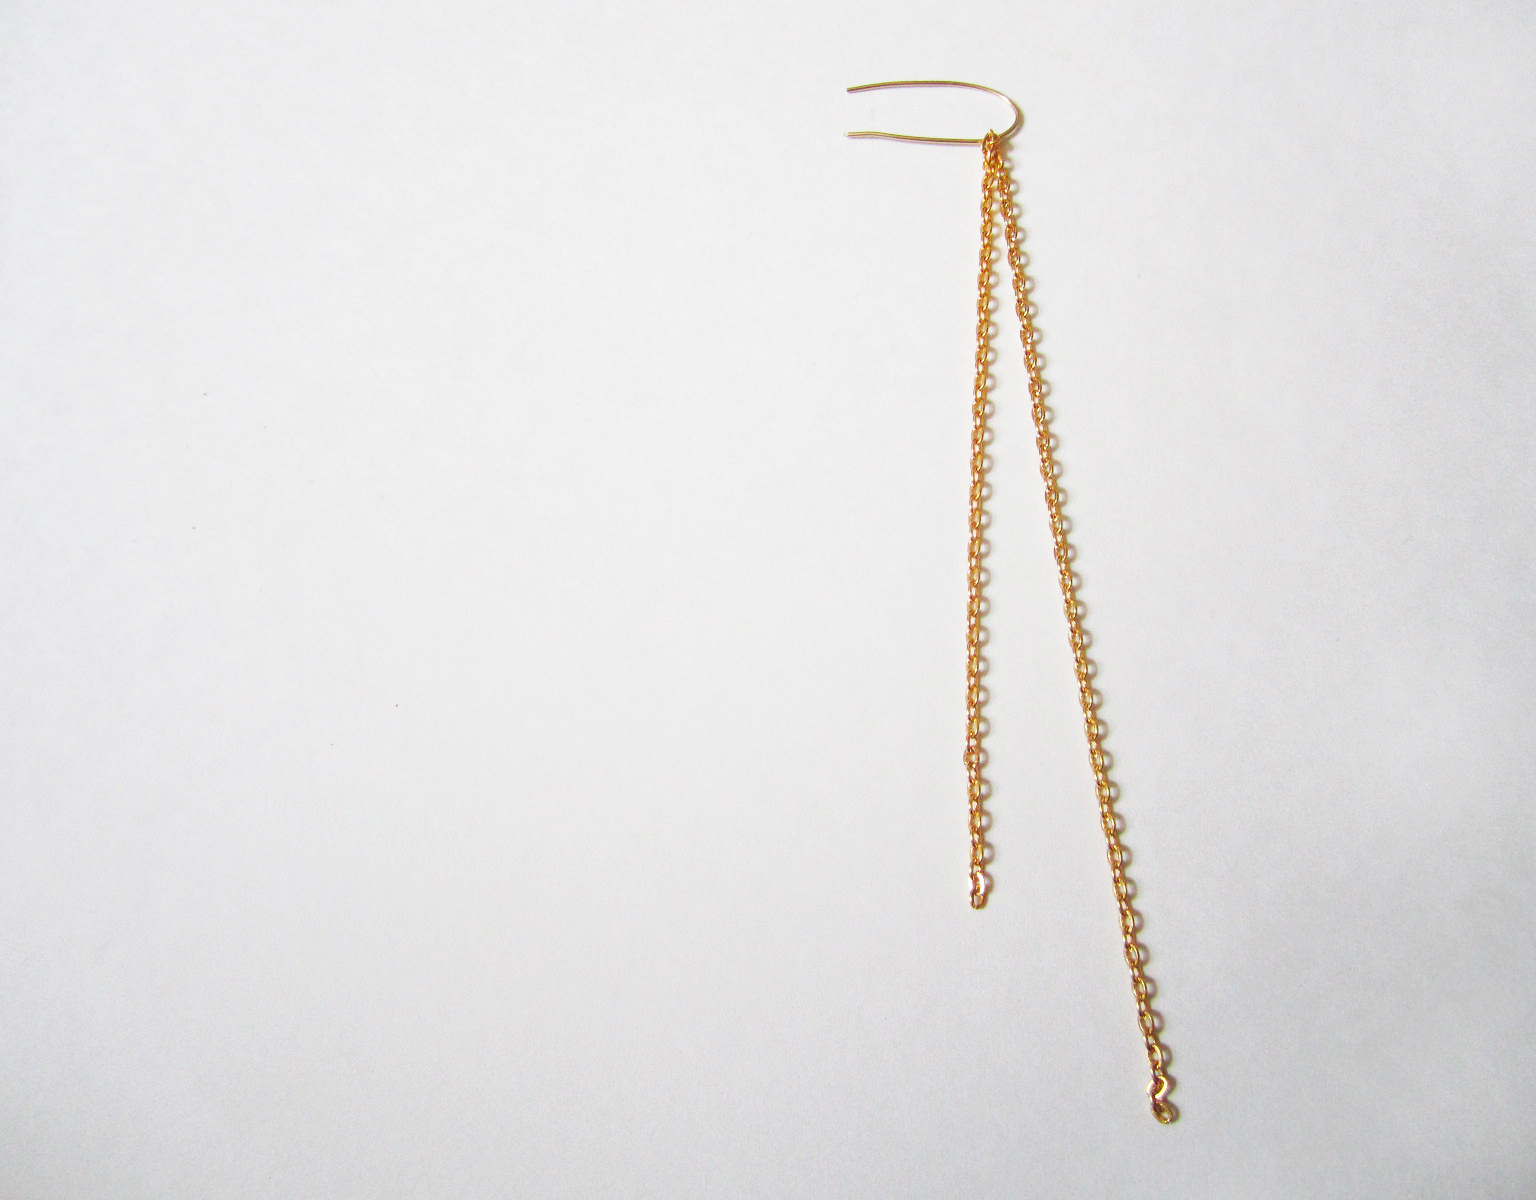
With the round nose pliers bend both ends of the wire inwards. Repeat.

Bring the chain forward to one side of the bent end of the wire. Repeat.
Take the flat nose pliers and at the half-way point of the wire begin to create the cuff by bending the wire around the pliers (as though you are folding it in half). Leave some room so that it will fit on your ear. Repeat for the other side.

Try the cuff on for size on the upper part of your ear. Adjust the wire until it fits comfortably.

At the end of the earring hook there is a small loop. Use the flat nose pliers and open up the loop. Bend the end of the loop towards yourself until it opens slightly. Repeat with the other earring hook.
Add the short end of the chain and then the longer end of the chain to the loop. Close the loop by using the flat nose pliers and bending the loop away from yourself. Repeat.

You’ve just made yourself some cool new ear pieces!


Let’s Connect:
![]()
![]()
![]()
![]()
![]()

Photo by Kristen Berk
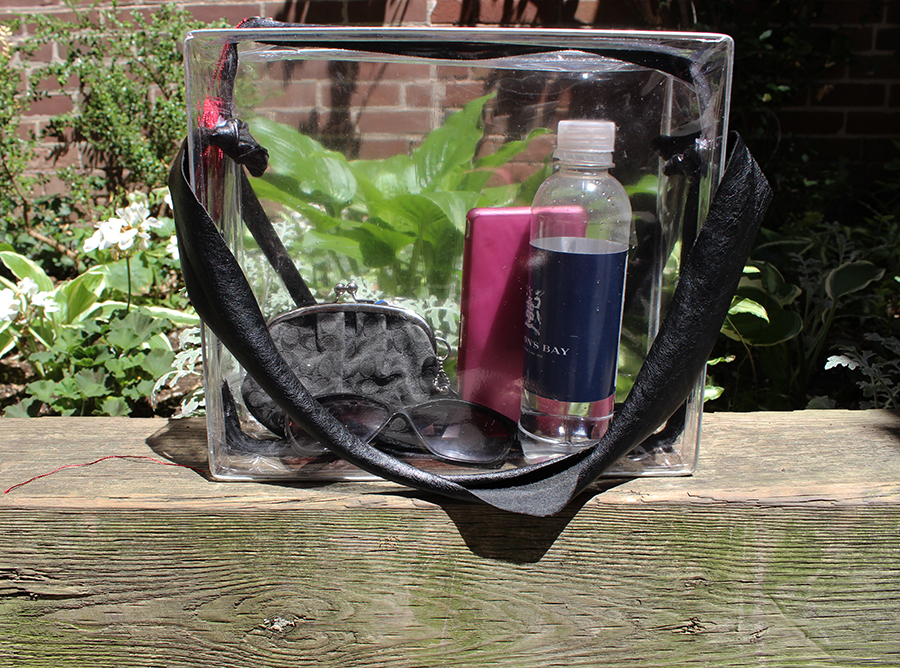
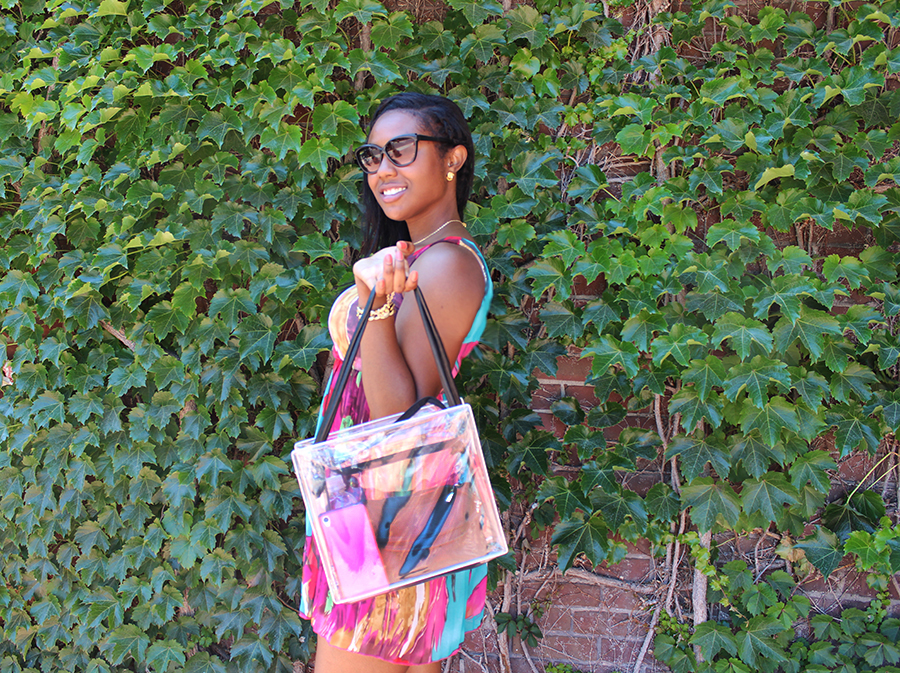
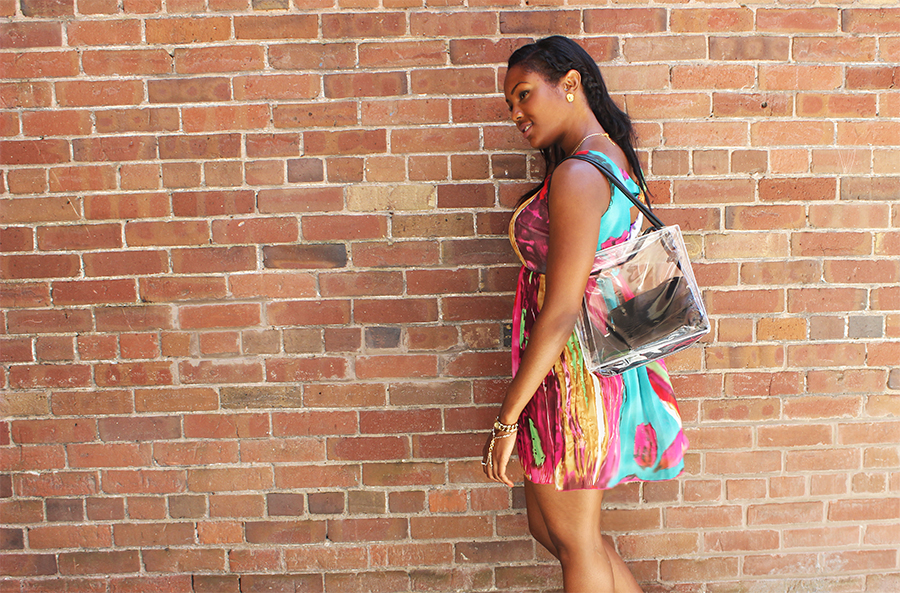
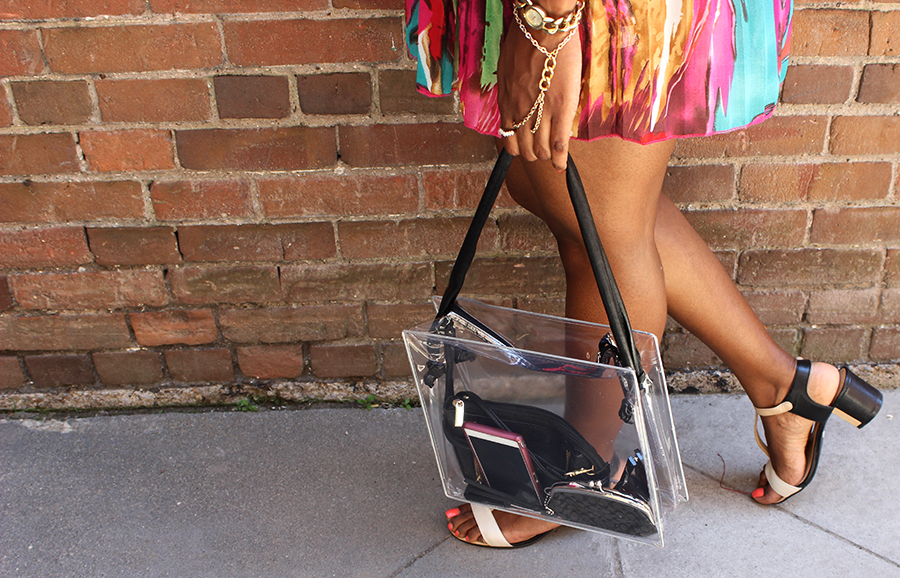
This DIY clear tote bag was inspired by the clear Hunter tote which I spotted while scrolling through Nasty Gal’s Instragram. A few days after, I had just finished putting on my new bed sheets and I was about to throw out the packaging when a light went off in my head. I realized it was the perfect base to create a DIY version of the clear Hunter Tote!
 Image Source: Nasty Gal Instagram
Ladies, you know the pain of having your bag feel like a big black hole that items seem to disappear into? You have to dig and shift your stuff around to find that one thing? That’s why I really love this bag! Because it’s clear I can see everything I no longer have to frantically search for my lip gloss. If you’re not comfortable with all the contents of your bag showing you can put a smaller purse or clutch inside the clear bag for items you want covered.
Here’s how I made it.
The Supplies

Transparent bed sheet case
2 Strips of material or ribbon
Hand hole punch
Marker
Glue
The Steps
On the top side of the bag I used the marker to draw a small dot for the location of the straps. I used the length of my thumb as measurement.
Using the length of my thumb again, I drew another small dot on the other side of the bag.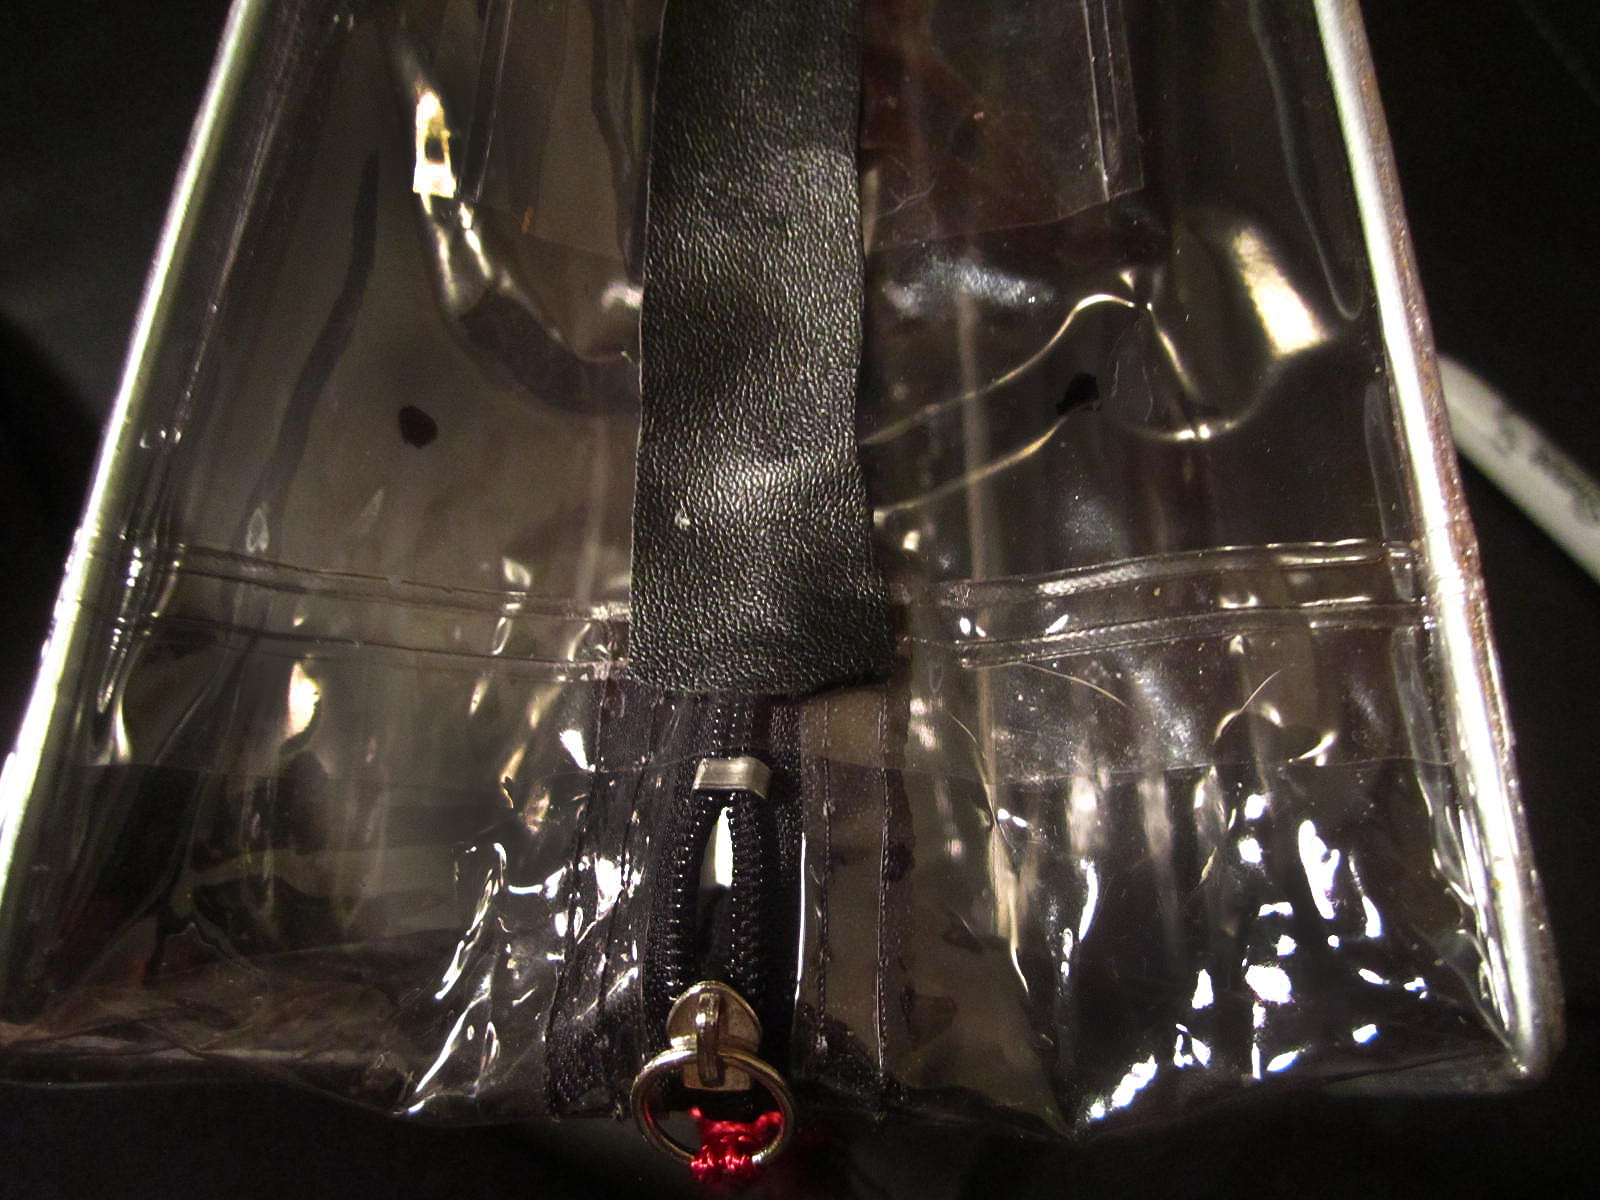
I repeated the last two steps for the other side of the bag, so there were 4 dots total.
I took the hole punch and punched a hole where each of the 4 dots were drawn.
I took a strip of material and measured it around my shoulder to see the best length for the straps, I made sure there was about an extra two inches of length (you have to knot the ends of the straps which takes away from the length). Once I had the length I wanted I cut another piece of material to the same size.
I pushed each of the straps into each hole on one side of the bag.
On the inside of the bag I triple knotted the end of the strap so that the knot could not fit through the hole. I repeated the same step for the other hole.
I took the straps making sure they were straight and I brought them over to the other side of the bag. I repeated the knotting process with the holes on the other side.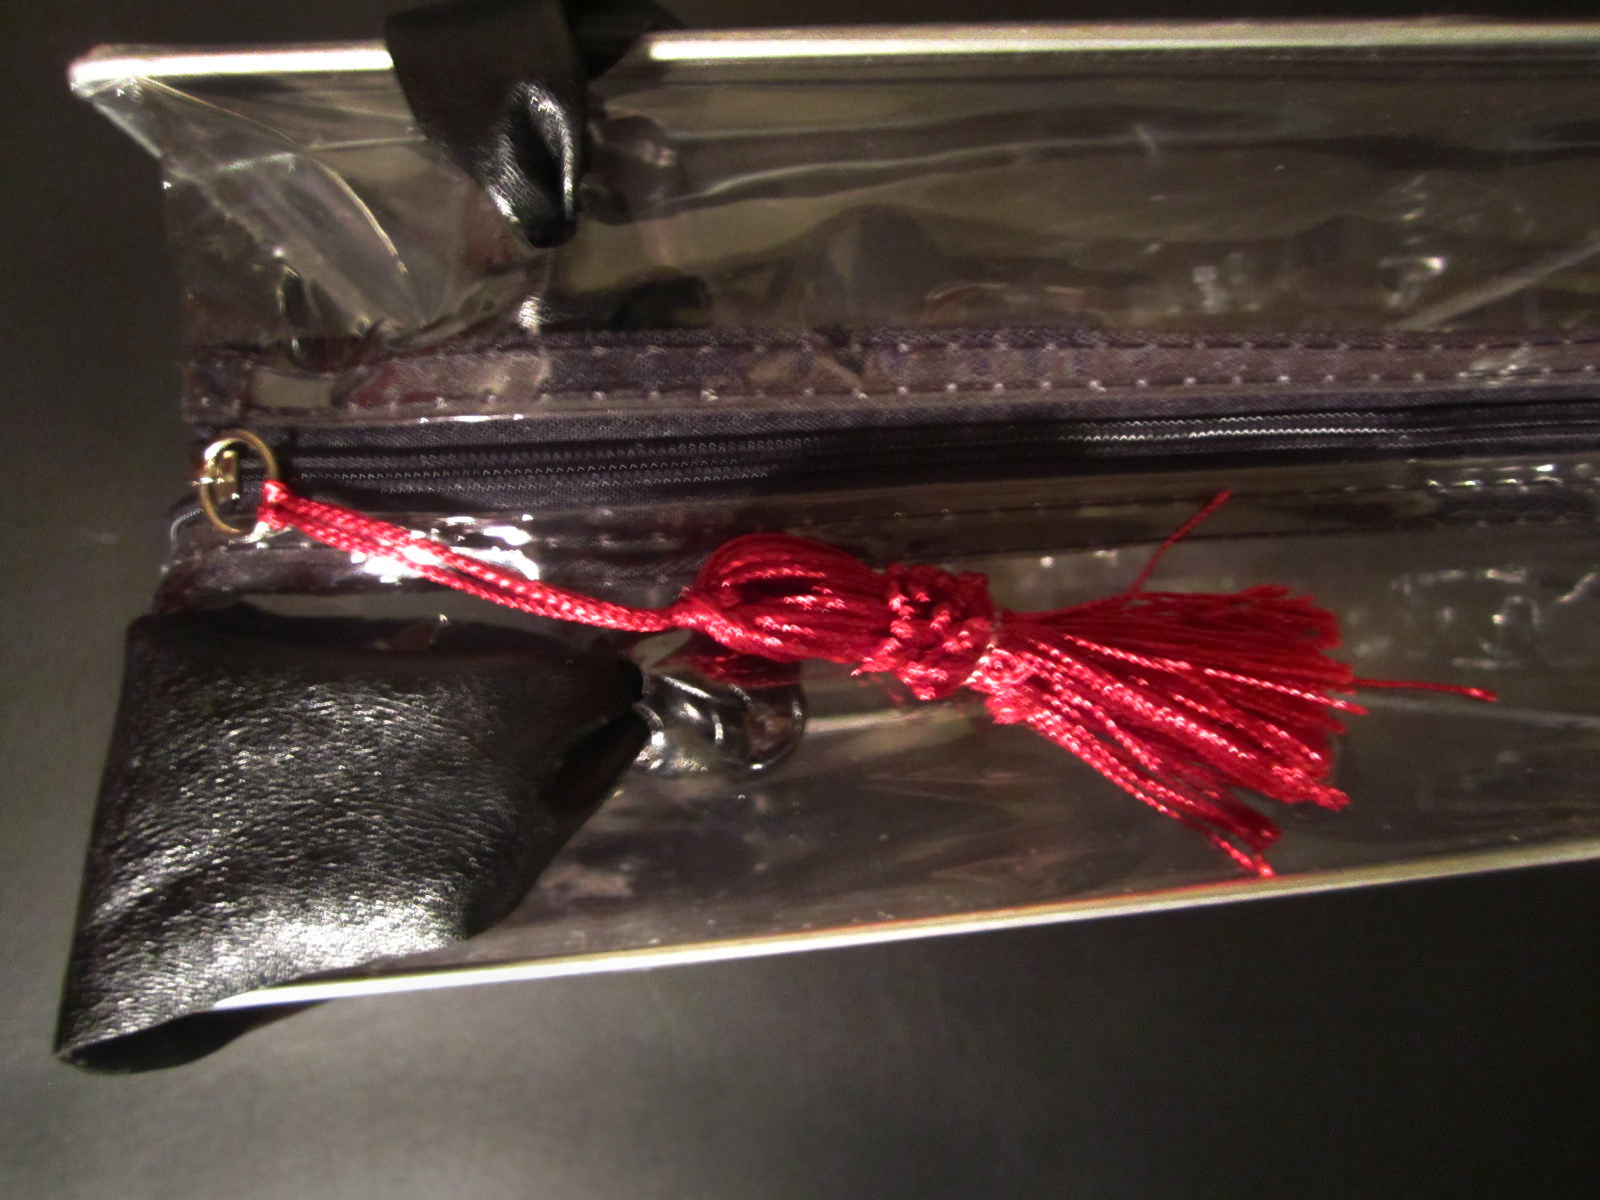
I added a dab of glue to the inside of the knot and glued it to the side of the bag. I held the knot to the bag for about 30 seconds. I repeated the gluing process for the other 3 holes.
I let the glue dry and that was it!

– Shanel

I’m loving all the fringes I am seeing pop up on everything from dresses, clutches, and shoes. Fringes are fun, flirty, and they can add cool movement and lines to an outfit.
Since DIYing fringes involves a lot of cutting I decided on a simple DIY fringe ankle cuff. Doing this project made me wish I owned a shredder so I could shred fabric to make fringes on command. I would add fringes to everything!
This DIY fringe cuff pairs great with gladiator style sandals or heels. Here’s what you’ll need.
The Supplies
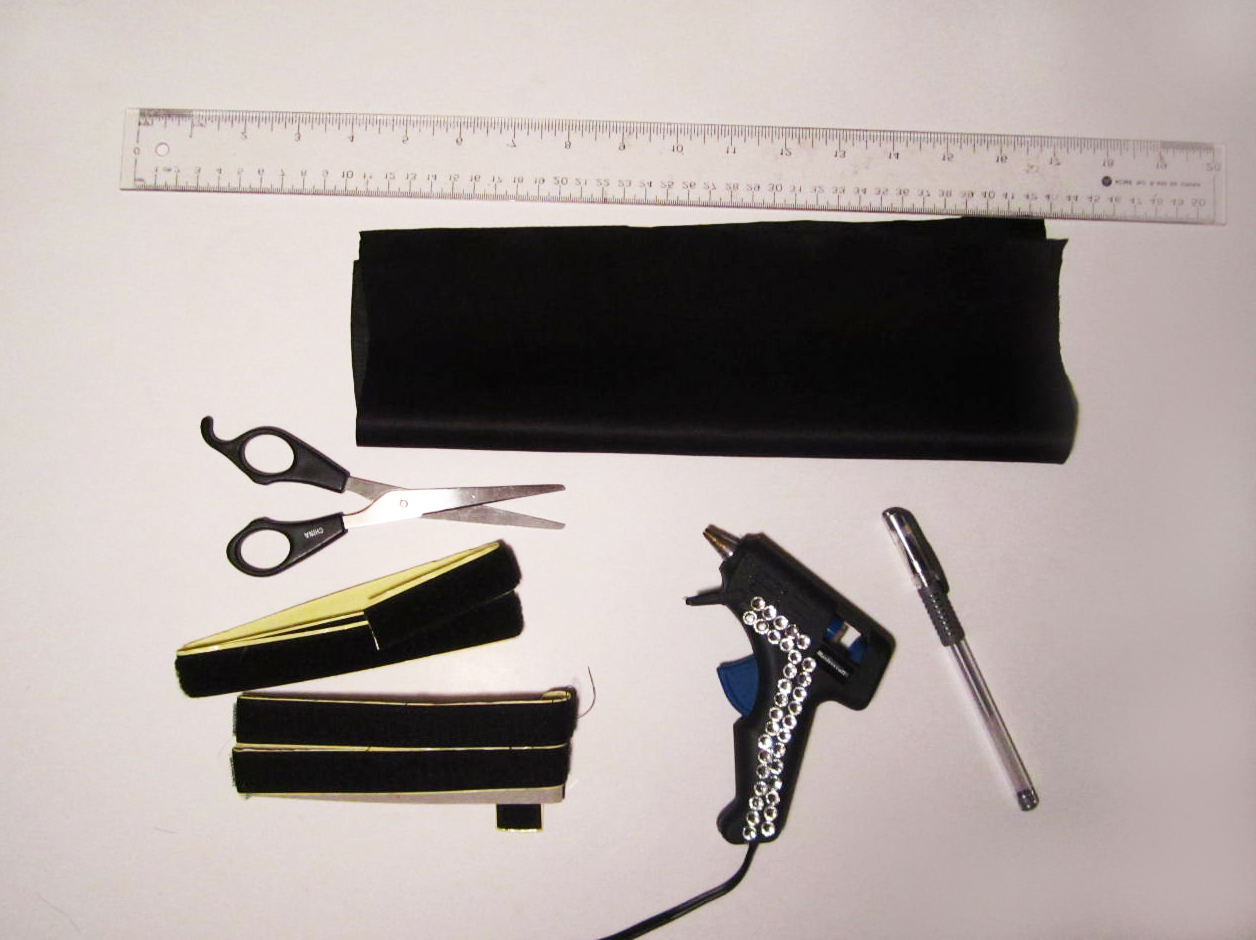
Fabric
Scissors
Ruler
Pen or Marker
Glue gun
Velcro
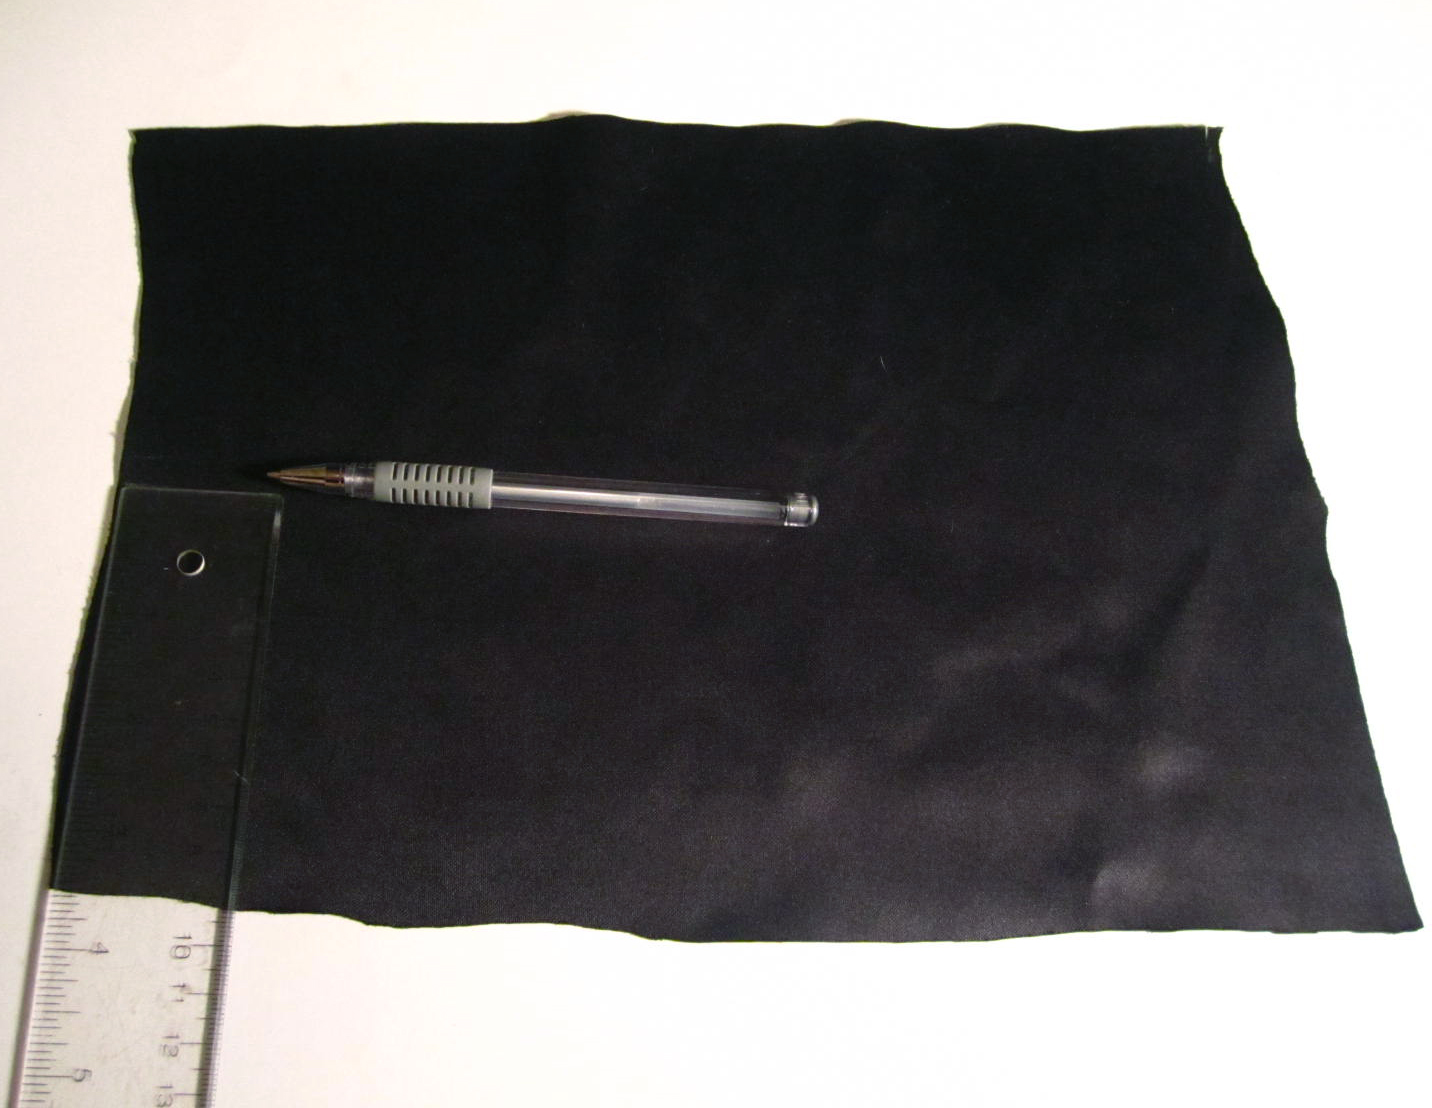
The size of my fabric was 6 inches high and 9 inches long.
The Steps
First, I measured the fabric around my ankle making sure there was an inch overlap. I cut off any excess material.
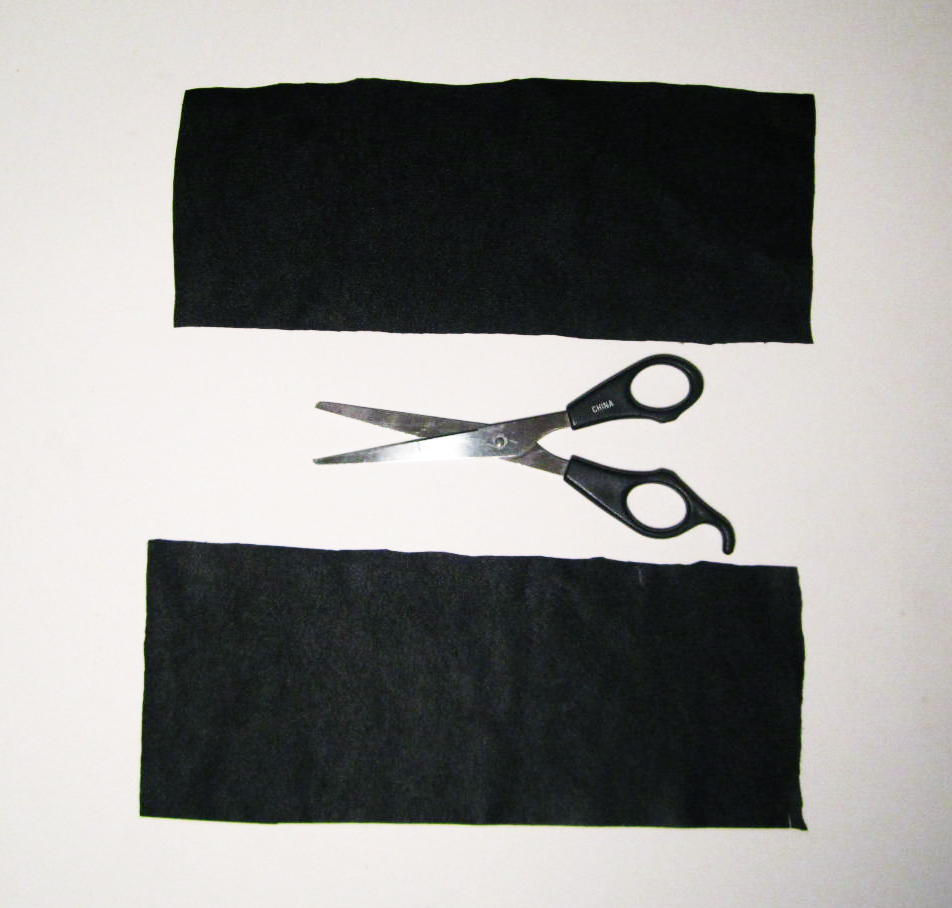
I folded the material in half, and used the pen to mark the half way point. I then drew a straight line across the middle of the material.
I cut the material in half so I had two sides.
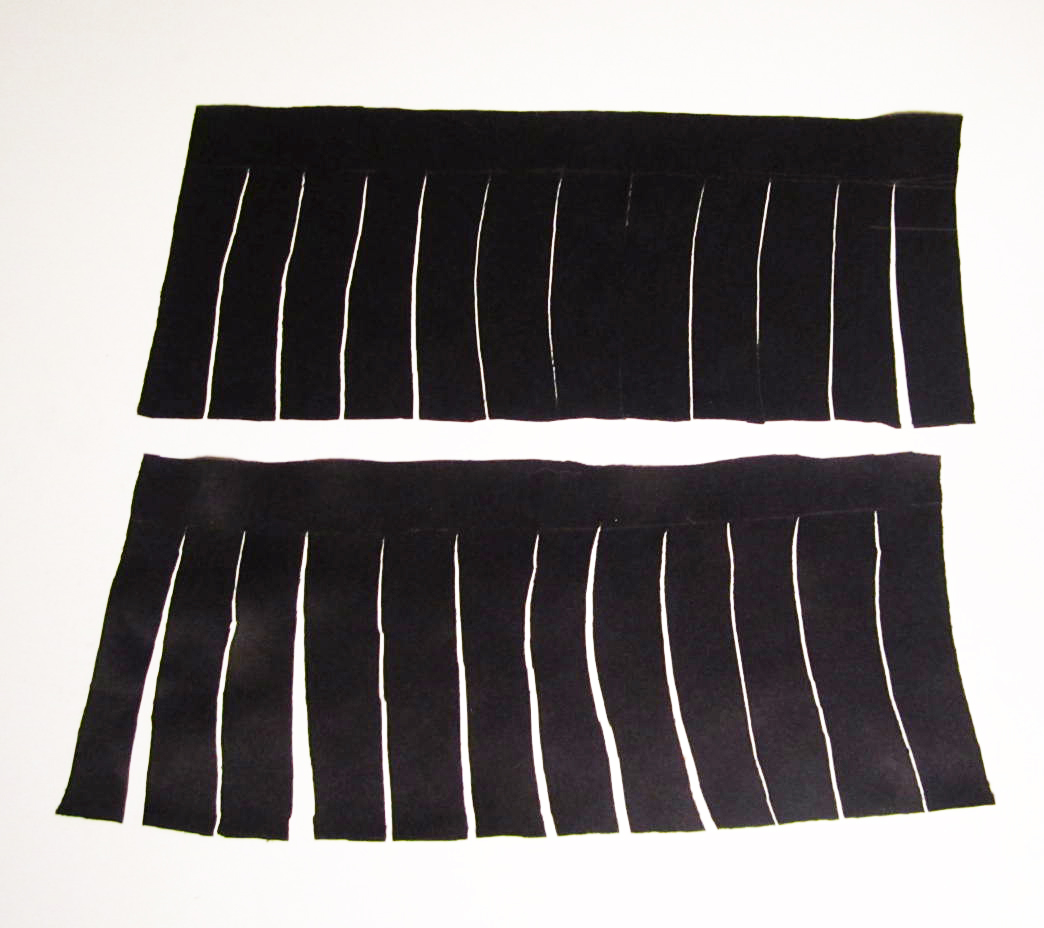
I drew a line that was ½ an inch wide across the top of the material. The line was the point I cut all the fringes up to.
You can cut your fringes to whatever size you like. I used the width of my thumb as a guideline and I began cutting the fringes up to the drawn line.

Repeat the last two steps for the other side.
Cut 1 inch pieces of both sides of the Velcro. Glue one side of the Velcro on the front side of the cuff.
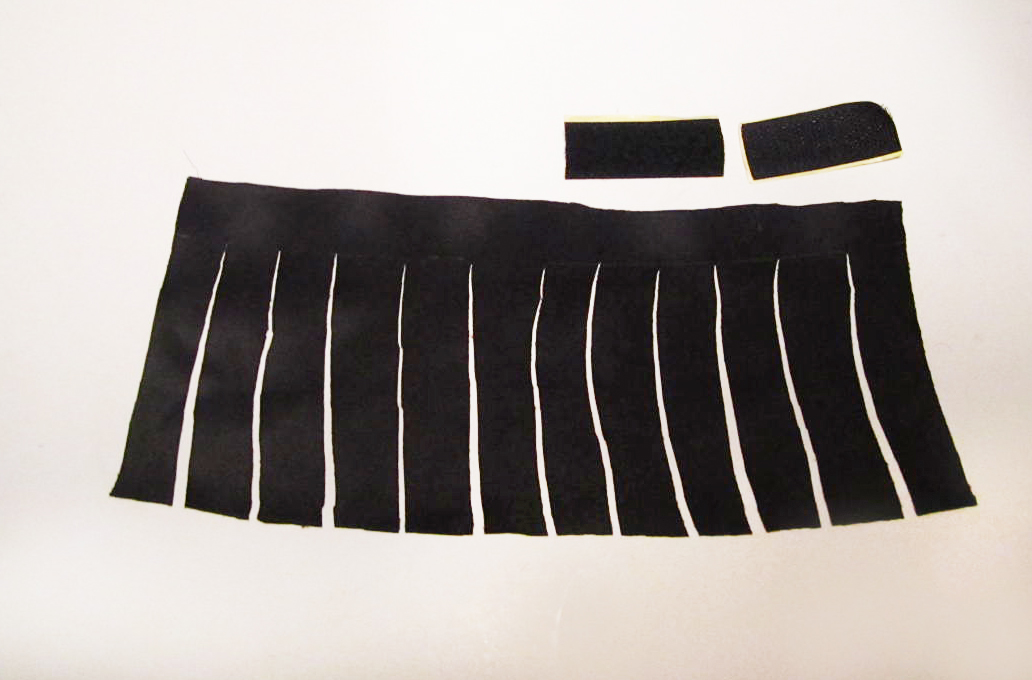
Turn the cuff over, and glue the other side of the Velcro to the opposite end on the back side of the cuff.
Repeat gluing on the Velcro for the other cuff.
Wear it!

Shoes: Material Girl
-Shanel

Today is one year since I started Think Outside the Cloth! Since I’m all about celebrating life’s little milestones I decided to throw on a DIY party hat and have cake. I also have some very exciting news! I will be hosting a bloggers networking event with two other great bloggers, Kristen (Twenties & Fabulous) and Stephan (Why I love Toronto). The event aims to unite those in the blogging community and I’m very happy to be apart of it.
This post will be a little different than the usual as I’ve decided to share some background about why I started this blog. I’ve always been a creative person at heart. As a child I loved drawing, creating, and doing odd things with clothes. As I got older that part of me faded into the background as I focused on school and work. A while ago I remember my father telling me “Shanel, one thing in life is KEY, Keep Educating Yourself” and that stuck with me. It’s taught me to always keep learning. Go to bed a little bit smarter than when you started the day, and with whatever you’re doing, or experiences that may happen in life always try and learn something from it.
Before starting this blog, I felt like I was caught in a repetitive routine of life, and I wasn’t growing or learning. I came up with the concept for this blog in December, 2013 while in the shower. I started thinking of DIYs and content, but it wasn’t until 5 months later that I actually got my gears in motion and started Think Outside the Cloth. There were many times where I questioned myself and made excuses; what if no one reads it? I don’t have a good DSLR camera, my pictures will suck! Is this stupid? I was also a bit hesitant, as the Internet is such a huge space. With creating and sharing content I feel like it’s putting a piece of myself out there, and with that there can be judgment. I brushed away all those thoughts and decided to just start and do it! I came up with the reasons of why I wanted to do this, and as cliché as it sounds I really do it as a way to express myself, and to execute the ideas that float around in my head. It’s taught me that whenever I’m doing a project and my mind becomes clouded with negative thoughts to just remember the mission, “the why.”
I’ve learned a lot since starting this blog, and I can’t say it’s been easy, there’s a lot that goes into making a post but I really like doing it. It really makes me respect bloggers who regularly post and share content. Think Outside the Cloth is definitely a work in progress, and I hope to continually improve it. If you’ve been delaying on starting or doing something remember why you want to do it, and just go and do it! No BS or excuses! If you really want it to happen you’ll find a way to make it work :).
Here are some of my most read posts:

Thank you to everyone who’s provided me with feedback, liked, commented, and shared posts! Stayed tuned for more DIYs, fashion tips and tricks.
-Shanel
I channeled my inner goddess and decided to create a gold headband out of a belt. I had this gold link belt sitting in my closet for a while and I never quite found the right outfit to pair it with so it went unused, until now. A DIY gold headband is pretty simple and if you don’t have a link belt you can always substitute with a gold coloured chain.

Here’s how I did it.
The Supplies
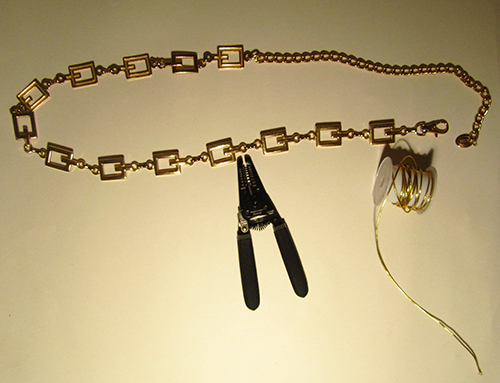
Wire cutters
Gold link belt or chain. If you are using a chain make sure the holes in the chain are big enough to fit the elastic through
Gold coloured elastic*
Scissors
Glue
*You can purchase from a fabric or craft store.
The Steps
I took the belt and measured it around my head. I left about 3 inches of space in the back for the elastic.
I used the wire cutters to cut the belt to the length I wanted.
Now it’s time to add the elastic. I looped the elastic through one end of the belt.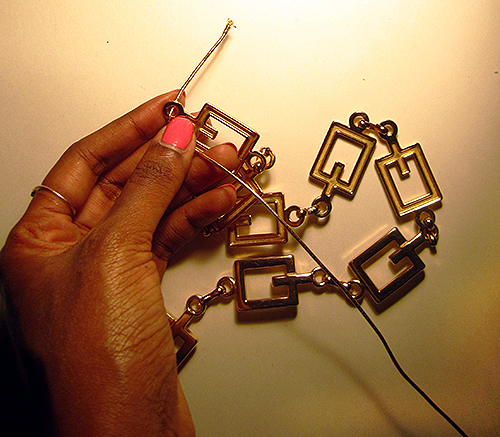
I looped the elastic all the way through so there were two sides. I measured the belt with the elastic around my head to ensure it fit comfortably. I then cut the elastic.

Where the loop began I tied a knot around one end of the belt.

To make the elastic stronger I began twisting it.
I twisted until both ends of the elastic had an inch left. I tied a knot to secure the twist making sure there was still space at the end of the elastic.

I tied the ends of the elastics around the other end of the belt and cut off the the excess. I added a dab of glue to secure the knot.

Voila!

-Shanel
