Happy Canada Day!

Featured

Canada Day Tee

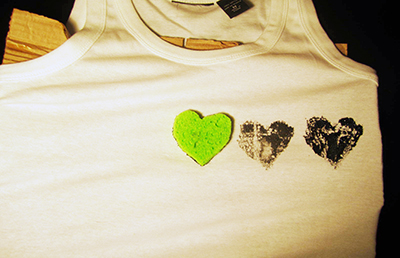
Even though Canada Day is officially tomorrow. I thought I’d share a quick way to do a Canada Day themed DIY. Follow the steps in my Graphic Print DIY, but instead use a maple leaf.

Print out a picture of a maple leaf, cut out the leaf and trace the outline with a marker onto the sponge. Evenly spread fabric paint onto the sponge and stamp your maple leaf onto shirts, shorts, scarfs or whatever you like! You can find a maple leaf outline here.

I’m showing my patriotism with a Canadian flag tank that I found at Winners.

Happy Canada Day!

-EssDotElle

DIY Flower Headpiece

Featured

headbandcover2

I first spotted the flower headpiece sometime during the spring, and I’ll be honest I wasn’t too crazy about it. As the the weather got warmer and I started seeing them on more heads, they grew on me (no pun intended). This flower headpiece is an easy DIY that makes a fun and flirty summer accessory.

Click to Take it-N-Make it ->>

7 Alternate Jewellery Uses

Featured

Alternatejewelleryuses

Think Outside the Cloth and try these 7 different ways to wear your jewellery. Get more looks from one piece, and add a little extra sparkle and shine to your clothing and accessories.

Click for the Tip ->>

DIY Graphic Print Shirt

Featured

Printshirtcover

This DIY is a super easy way to add some character to a plain shirt. This project was inspired by P.S. I Made This Printed Jeans. Since this was my first time using fabric paint I decided to keep it simple, but I’m definitely going to try this again with a more intricate pattern. I love the textured effect the sponge gives.

The Supplies

Plain Shirt
Fabric Paint
Sponge
Marker
Scissors
Piece of cardboard

The Steps

Draw the outline of whatever shape you want to imprint on the sponge. I (obviously) decided on a heart.

Cut out the shape.

sponge cut out

Place the piece of cardboard in between the shirt so the paint does not soak through to the back.

Take the fabric paint and apply it evenly on your sponge shape.

Press the sponge down on the shirt.
spongeprint
Repeat, evenly reapplying the paint to the sponge when necessary.

Optional: Once I was finished I added some dots of gold coloured fabric paint.

hearts

-EssDotElle ❤


DIY Strapped Bandeau

Featured

Bandage bra coverI’m really excited to share this project because it was really inexpensive to make (shout out to my local dollar store lol), and I really liked the way it turned out. I plan on making another one in a different colour. Fair warning, this project does require a bit of sewing but don’t be discouraged my sewing skills are very very basic and it turned out great.

Wear the strapped bandeau on it’s own, under a sheer shirt, or with a muscle tee.

Click to Take it-N-Make it ->>

Trick — Top 2 Bottom

Featured

Top2BottomsCover

Get two different looks from one piece. Put on a cute top and wear your tube top as a skirt.

-EssDotElle

Tip — Adhesive Bra

Featured

Adhesivebracover

If you’re going out for a night on the town and you decide on a risqué revealing outfit with a plunging neckline or an open back it can be really difficult to find the right bra. Adhesive bras are a great leave-your-regular-bra-at-home solution. They lift, support, add shielding, and come in variety of shapes and styles. When you apply them make sure your skin is lotion and oil free and they should last all night. You can find them at lingerie stores and some pharmacies (specifically Shoppers Drug Mart).

-EssDotElle

How to – DIY Body Chain

Featured

Bodychain cover

The first time I spotted a body chain was in a picture of Beyonce walking hand in hand with Jay-Z, and my first thought was what is that?! And where can I get one?! Fast forward months later. While browsing around a jewellery supply store, I thought I could attempt to make my own body chain, and that same night I stumbled across LaurDIY’s tutorial. I now have a DIY body chain to call my own and I plan to rock it every chance I can this summer.

Click to Take it-N-Make it ->>

Trick — T-Shirt to Tank

Featured

Teerevampcover

Revamp your neglected, (or in my case) awkward fitting t-shirts and give them a little love. This trick is a super easy, no-sew method which will turn your tee into an edgier looking tank.

Click to Learn the Trick –>

Tip — Bye Bye Deodorant Stains

Featured

IMG_3626 copy

Ever have those days where you have a last minute change of heart about an outfit, or you try on a million pieces of clothing before you find the one outfit that works? Finally content, you do one last check in the mirror and whomp whomp there’s a bunch of ugly looking deodorant stains along the sides of your shirt. Don’t fret.Take a fabric dryer sheet and gently rub it on the stains to remove them, and you’ll be good to go!

-EssDotElle