How to make a DIY Hanging Plant

Featured

I really liked how this hanging plant turned out, it’s a simple way to add a dash of colour to the dreary winter days. I had wanted a hanging plant for a while but wasn’t able to find rope strong enough in my craft supplies, so I decided to improvise and use chain ( which I had so much of). Check out the video to learn how to make your own.
Hope you enjoy 🙂

DIY Belt | Easy T-shirt Up-cycle

Featured

This DIY belt is a cute accessory that’s super easy to make. Watch the video to learn how!

How to Make DIY Leaf Shaped Earrings

Featured

Inspired by fall, these DIY leaf earrings are a great way to up cycle leather or material scraps. I really like how light they are, and you can make them in many colours!

Watch the video below to learn how to make your own DIY leaf earrings.

The Supplies

Leather scrap
Scissors
Jump rings
Fish eye earring hooks
Leather hole punch

The Steps

Take your leather piece and cut out the leaf shape

Use your first piece as an outline to cut out the second earring

To give the earring more detail I cut five small slits starting from the bottom moving upwards on each side of the earring. Repeat on the on the other earring

Take the leather hole punch and make a small hole at the top of the earring. Repeat on the other side

Open up your jump ring and put one jump ring through each of the holes

Add a fish eye earring hook to each jump ring

Close the jump rings

And you’re done!

I hope you fall for these earrings as much as I did!

Shanel Signaure


How to make a DIY Wrap Dress

Featured

This DIY Wrap Dress is super simple, and I love it because it can be worn so many different ways! You can layer it over an everyday outfit and wear it as a vest, or use it as a cover-up for the beach. Yay versatility! I plan on making more in a few different colours.

I decided to try something new and use Snapchat to record the tutorial, let me know what you think!

The Supplies

Stretchy fabric
Scissors

The Steps

Cut the material into a rectangle. The shorter the width of your material the shorter it will be on you.

Fold the material in half.

At the folded end about 4 inches from the top cut out a semi circle.

Open the material up and you’ll have a circle in the middle.

Put your arm through one side of the circle and then through the other side.

Wear however you like!

-Shanel

How to Create Your Own Vision Board

Featured

DIY vision board2

I have been doing a lot of reflection, contemplation and I’ve recently been dabbling into meditation and through all of this I’ve come to realize the importance of vision. The way I see it, vision is – taking the time to think about what is truly important to you and literally picturing “it”. “It” can be that event you want to happen, characteristics or habits you want to adapt, or whatever you would like to attract in your life.

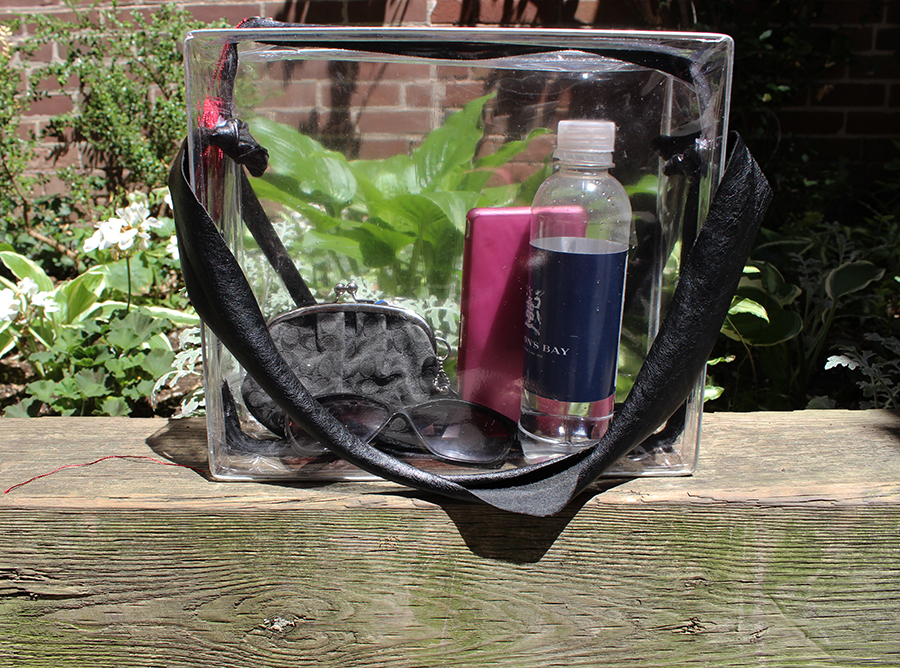
You can apply vision for big goals or even minuscule things, for example I was tired of carrying my laptop in my purse so I decided I wanted a pleather or leather nap sack and I pictured it in my head. I went to Winners and sure enough I walked in and there was one pleather knapsack in the price range and style I wanted! That is just a small materialistic example but I have had other more significant events happen in my life where I envisioned them before they happened.

Visualization isn’t magic, you obviously also need to take action to make your visions come to life, but having a clear vision can help keep you on track to achieving your goals. A great way to be reminded about your visions or goals is through a vision board. There’s no “right” way to create your board but but continue reading for my tips on how to DIY your own vision board!

The Supplies*

Visionboardsupplies

A blank board or piece of paper
Magazines, some printed images, and text
Scissors
Glue, tape or pins

*You can also create a digital version of a vision board and save it as your desktop or phone background.

The Steps

Take a few deep breaths and think about why you are creating this vision board and it’s theme. If you don’t have a specific goal, event, or you’re not sure what you want, a good exercise is to take a piece of paper and write down “What do I want?”  go with the flow and jot down whatever comes to mind. You can then base your vision board around your answers. I decided to create a vision board for the things I want and the habits I want to adapt for 2016. You can create a vision board for a shorter period of time or specific events or goals.

Visionboardreflect

Gather images and text from magazines, the Internet, or photos you already have. These images should inspire, motivate, and make you feel good.

Howtocreatevisionboard

Cut out the images and arrange them on your board. Once your happy with the layout glue, pin, or tape them down. I personally like to have a bit of space between images.

DIY vision board

Lastly, leave your vision board in a place where you can see it clearly so you can briefly take time to remember and reflect on your visions.

What are some goals you would like to achieve this year?

A big thank you to Emilie from Facade for snapping these pics!

– Shanel

Friday Night Live at the ROM | DIY Leaf Print Shirt

Featured

DIY Print ShirtFall has always been my favourite season, it’s so scenic. I love walking down the street admiring all the beautiful changing colours of the trees, and suddenly a gust of wind blows and the leaves surround me falling delicately to my feet. It makes me happy just thinking about it.

FallPhoto

This leaf print DIY shirt is a great way to enjoy fall and all it’s beauty, and as a Canadian it made me feel a bit patriotic with the maple leaf being a part of our flag.

DIY Leaf Print Shirt

Green Graffitti copy

The inspiration for this DIY came to me when I attended one of my favorite events, Friday Night Live at the ROM. FNL has returned (another reason why I love fall!) and it runs until November 27th. Every FNL has a theme and last weeks was Thank You Canada. As a sponsor of the event Ford provides fun costumes and props that go along with each weeks theme. My friend Justine and I had a blast dressing up in “Canadian attire” and throwing leaves around. This Fridays theme is Dig it! It’s all about archaeology you can check the FNL event schedule here.


ROM Thank You CanadaJustine & I having fun at #FNL

Continue reading for the DIY

The Supplies

DIYSupplies

A Shirt
Leaves
Fabric Paint
A Paint brush
Piece of cardboard
A tray

The Steps

The first thing you will need to do is collect some leaves of varying sizes. This was a lot of fun! I went to a park named Trinity Bellwoods and found some leaves that had just fallen off the trees. The fresher the leaf the better, don’t collect the dried leaves as they are more prone to cracking and breaking when you paint them.

Pickingleaves

throwingleaves

If you’re not going to do the DIY within a few days, store the leaves in a zip lock bag and keep them in a book so they don’t dry out and they will be nice and flat when you’re ready to use them.

Fall Leaves

Put the piece of cardboard inside the shirt, so the paint doesn’t seep through to the other side.

Layout the leaves on the shirt from largest to smallest, or whichever way you prefer.

Fall shift DIY1

Pour some paint onto a tray and dip the paint brush in. Hold the leaf in the middle and paint all around the edge of the leaf.

Shirt DIY 2

Repeat for the other leaves.

Shirt DIY 3

Remove the leaves and let the paint dry, and voila you’re done!

Shiry DIY 4

Shirt DIY 5

Graffiti1Shanel Signaure

How To Make A DIY Chain Cuff Earring

Featured

Diy earring and cuff1

DIYEarringCuff2 copy

Accessories and jewelry are my favorite thing to DIY, so I’m happy to share this DIY chain cuff earring! I was looking for some inspiration when I came across these DIY ear cuffs. I thought they were pretty neat because you can wear them anywhere on your ear, even if they are not pierced. I practiced making a few cuffs when I decided I wanted to glam it up, so I tried adding some chain. I love the way they turned out.

Continue reading for the DIY.

The Supplies

DIY Cuff Earring Supplies

A ruler
Crafting wire I used 20 gauge wire
Round nose pliers
Flat nose pliers
Chain
Earring hooks
Scissors

The Steps

Cut a 2 inch piece of of crafting wire, bend the wire in half. Repeat.

DIYcuffearrings01

Cut 2 pieces of 11 inches of chain.

DIYcuffearrings02

At the 5 inch point of the chain push the bent wire through. Repeat with the other piece of chain.

DIYcuffearring03

You should have two uneven pieces of chain hanging from the wire.

DIYcuffearring04

With the round nose pliers bend both ends of the wire inwards. Repeat.

DIYCuffearring5

Bring the chain forward to one side of the bent end of the wire. Repeat.

Take the flat nose pliers and at the half-way point of the wire begin to create the cuff by bending the wire around the pliers (as though you are folding it in half). Leave some room so that it will fit on your ear. Repeat for the other side.

DIYcuffearring6

Try the cuff on for size on the upper part of your ear. Adjust the wire until it fits comfortably.

DIYearringcuff06

At the end of the earring hook there is a small loop. Use the flat nose pliers and open up the loop. Bend the end of the loop towards yourself until it opens slightly. Repeat with the other earring hook.

DIYearringcuff7

Add the short end of the chain and then the longer end of the chain to the loop. Close the loop by using the flat nose pliers and bending the loop away from yourself. Repeat.

DIYcuffearrings8

You’ve just made yourself some cool new ear pieces!

DIYcuffearrings9

Shanel Signaure

Let’s Connect:

InstagramTwitterEmail

DIY Paint Print Jeans

Featured

DIY Paint PrintJEANS
Photo by Ljubomir Pavkovic

Fabric paint is a really great tool to work with, there are so many patterns and designs you can create to spruce up any piece of clothing. That’s why I was happy I had some on hand for these DIY paint print jeans.

I had put on these white jeans and I was about to head out when I noticed there were blue stains all over the back. I had accidentally stored them under a pair of dark wash jeans, so some of the blue dye had rubbed off on them, whoops! I was a bit upset that my white jeans were now ruined, but with a bit of thinking I knew I could DIY them into something new. Continue reading for the DIY below.

DIY Paint Print Pants back
Photo by Ljubomir Pavkovic

The Supplies

DIY Print Jeans Supplies

Jeans
Fabric Paint
A Tray
Sponge
Paint brush
Tape
2 Garbage bags

The Steps

Lay your pants on a flat surface, take a garbage bag and pull it through the pant leg (so that the paint doesn’t soak through to the other side), do the same for the other leg.

Put some fabric paint on the tray and dip the sponge into the paint. Take the brush and evenly distribute the paint onto the brush.

DIY Paint Print Jeans 1

Take your sponge and press it paint-side down onto the pant starting from the bottom. Since the first application has fresh paint, press lightly and then gradually increase the pressure on the sponge.

DIY Paint Print Jeans2

Continue pressing the sponge down onto the pant until there is no more paint coming off the sponge.

Reapply paint to the sponge and evenly distribute with the brush. Again, press the sponge onto the pant.

IMG_7946

Continue the last 2 steps until you’ve painted the front of the pants.

DIY Print Pants 4

I decided I wanted to have a different colour around the pockets so I left the area unpainted. I added some pink paint to a brush and painted around the top part of the pockets.

DIY Print Jeans 5

Let the paint dry completely. Flip the pants over and sponge paint the backside of the pants. If you would like to add a second colour to the back pockets like I did. Leave the area unpainted. Let the paint dry completely.

DIY Paint Print Pants 6

Add the tape across the back pockets and then tuck the garbage bags into the pockets. With the paint brush paint the second colour up to the tape line.

DIY Print Pockets 7

Let the paint dry and then remove the tape.

DIY Print Pants 8

Voila, you’ve got yourself an almost new pair of pants.

-Shanel
Let’s Connect:

InstagramTwitterEmail

DIY Clear Tote Bag

Featured

DIY Clear Hunter Bag
Photo by Kristen Berk

This DIY clear tote bag was inspired by the clear Hunter tote which I spotted while scrolling through Nasty Gal’s Instragram. A few days after, I had just finished putting on my new bed sheets and I was about to throw out the packaging when a light went off in my head. I realized it was the perfect base to create a DIY version of the clear Hunter Tote!

Clear Hunter ToteImage Source: Nasty Gal Instagram

Ladies, you know the pain of having your bag feel like a big black hole that items seem to disappear into? You have to dig and shift your stuff around to find that one thing? That’s why I really love this bag! Because it’s clear I can see everything I no longer have to frantically search for my lip gloss. If you’re not comfortable with all the contents of your bag showing you can put a smaller purse or clutch inside the clear bag for items you want covered.

ClearbagDIY

Clear Tote Purse Bag DIY

Brick Wall Clear Bag Tote

Here’s how I made it.

The Supplies

DIY Clear Purse Supplies

Transparent bed sheet case
2 Strips of material or ribbon
Hand hole punch
Marker
Glue

The Steps

On the top side of the bag I used the marker to draw a small dot for the location of the straps. I used the length of my thumb as measurement.Clear Purse DIY 1

Using the length of my thumb again, I drew another small dot on the other side of the bag.Clear Purse DIY3

I repeated the last two steps for the other side of the bag, so there were 4 dots total.

I took the hole punch and punched a hole where each of the 4 dots were drawn.Clear Purse DIY 4

I took a strip of material and measured it around my shoulder to see the best length for the straps, I made sure there was about an extra two inches of length (you have to knot the ends of the straps which takes away from the length). Once I had the length I wanted I cut another piece of material to the same size.

I pushed each of the straps into each hole on one side of the bag.DIY Clear Hunter Bag 6

On the inside of the bag I triple knotted the end of the strap so that the knot could not fit through the hole. I repeated the same step for the other hole.DIY clear purse 7

I took the straps making sure they were straight and I brought them over to the other side of the bag. I repeated the knotting process with the holes on the other side.DIY Clear Purse 8

I added a dab of glue to the inside of the knot and glued it to the side of the bag. I held the knot to the bag for about 30 seconds. I repeated the gluing process for the other 3 holes.

I let the glue dry and that was it!DIY Clear Tote Purse 8

DIY clear tote purse bag 2

Clear Tote Bag DIY

– Shanel

DIY Fringe Ankle Cuff

Featured

DIY Fringe Cuff

I’m loving all the fringes I am seeing pop up on everything from dresses, clutches, and shoes. Fringes are fun, flirty, and they can add cool movement and lines to an outfit.

Since DIYing fringes involves a lot of cutting I decided on a simple DIY fringe ankle cuff. Doing this project made me wish I owned a shredder so I could shred fabric to make fringes on command. I would add fringes to everything!

This DIY fringe cuff pairs great with gladiator style sandals or heels. Here’s what you’ll need.

The Supplies

DIYFringeCuff supplies

Fabric
Scissors
Ruler
Pen or Marker
Glue gun
Velcro

The size of my fabric was 6 inches high and 9 inches long.

The Steps

First, I measured the fabric around my ankle making sure there was an inch overlap. I cut off any excess material.

I folded the material in half, and used the pen to mark the half way point. I then drew a straight line across the middle of the material.

DIYfringeanklecuff02

I cut the material in half so I had two sides.

DIYFringecuff half copy

I drew a line that was ½ an inch wide across the top of the material. The line was the point I cut all the fringes up to.

You can cut your fringes to whatever size you like. I used the width of my thumb as a guideline and I began cutting the fringes up to the drawn line.

DIYFringeCuff3

Repeat the last two steps for the other side.

DIYFringeCuff6

Cut 1 inch pieces of both sides of the Velcro. Glue one side of the Velcro on the front side of the cuff.

DIYFringleCuff7

Turn the cuff over, and glue the other side of the Velcro to the opposite end on the back side of the cuff.

Repeat gluing on the Velcro for the other cuff.

Wear it!

IMG_7788

Shoes: Material Girl

-Shanel