5 Fix-it Fashion Tools

Featured

jessicaalba1-300x253

Wardrobe malfunctions are a huge annoyance that anyone who wears clothes has likely experienced on occasion. These tools are great to have handy if you find yourself in a clothing catastrophe.

1. Safety pins

10-Easy-Ways-to-Reuse-Safety-Pins-300x206

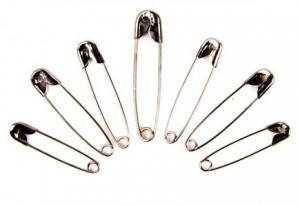
Safety pins are a great tool for when you need to fix a wardrobe malfunction in a hurry. You can use a safety pin to hide an exposed bra strap by pinning to the inside of your shirt. Safety pins can also help hold pieces of a broken chain together.

Got a broken zipper? they can help with that too, use a safety pin as a replacement tab. They’re also a great last resort for holding material together when you have no time to sew.

Plus, here a bunch of DIYs you can try making with safety pins.

2. Double sided tape

J lo dress

Jennifer Lopez’s epic Grammy outfit probably would not have happened without the help of double sided tape.

Use double sided tape to keep knee high socks and stockings from falling, as a temporary hold for loose hems, and to hold fabric in place for plunging shirts or dresses. For bustier girls, it’s also a great tool for keeping gaping holes in your button down shirts closed, which helps avoid any awkward stares below the neck.

3. Clear nail polish
clear nail polish
Clear nail polish doesn’t just make your nails look pretty, paint on a coat to keep your costume jewellery from tarnishing. To stop a stocking run in its tracks, paint on clear nail polish on both ends of the run. Also use it to save time when threading needles by adding to the end of unruly thread.

4. Permanent markers
permanent marker
Use permanent marker to quickly cover up any scuffs or scratches on black heels or bags.

5. Rubber Elastics

0706SIM03

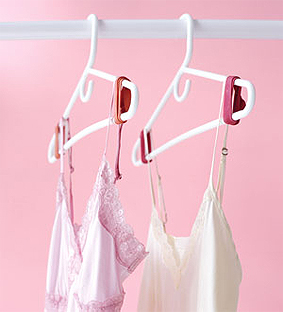
If you, like me prefer to hang most of your clothes it’s pretty annoying when you have shirts that constantly fall off. Add some rubber bands on the ends of the hanger and problem solved. If you have a long belt that you want to wear high on your waist, add a small elastic to the same end as the belt buckle to hold up the long hanging end.

Do you have any annoying wardrobe malfunctions stories? Share below!

-Shanel

Image Sources: Image 1, Image 2, Image 3, Image 4, Image 5, Image 6


DIY Graphic Print Shoes

Featured

PaintedShoesDIYcover

The wardrobe transition has started. It’s that time of year to swap the sandals for closed toe shoes and boots. While I’m clicking my heels together wishing for another week of summer weather, I decided to revamp an old pair of flats and give them a new look. Read on to learn how.

The Supplies

A pair of shoes
Acrylic paint. If your shoes are a fabric material like Chuck Taylors use fabric paint instead.
Paint brushes
Small bowl
*Clear drying finish such as Mod Podge Outdoors

*If your shoes are made of fabric material skip the finish.

The Steps

Clean the shoes making sure they are free of any dirt or debris.

PaintedShoeDIY

Pour some paint into the bowl, using the paint brush create whatever design you like. You can customize your shoes by splattering the paint or creating polka dots. I created my design by putting a big blob of paint onto the shoes and then I used the paint brush to spread the paint to create lines.

Let the paint dry.

DIYshoesdrying

Once the paint is fully dried. Use a large paint brush to paint on the finish, leave to dry for 24 hours.

PaintedShoesDIY3

And you’re done!

PaintedShoesShanelpaintedshoes

-Shanel

NYFW Dash of DIY Inspo

Featured

With the recent finale of New York Fashion Week. I decided to scope both runway and NYFW street style looks for some dashes of DIY inspiration. Even though winter hasn’t started (**shudders) the collections made me excited for what styles are to come for Spring 2015. Check out the pics below for 2014 NYFW looks and DIY inspos.
 
Proenza Schouler SpringSummer 2015

Proenza Schouler Spring/Summer 2015

I could see myself twirling in these dresses all day long! To get this flirty fringe take a maxi skirt or dress start from the bottom and begin cutting long narrow strips up to the thigh. Stretch each strip as you go.

 NYFW Street Style
As a sucker for colours this statement clutch looks like a bag of fun (lol see what I did there?). To don this as a DIY find a plain clutch and brightly coloured fabrics. Create a stencil with paper, cutting out different sized and shaped pieces. Trace the outlines of the stencils on the different coloured fabric and cut out. Use a good fabric glue to stick the cut outs on to the clutch. 
 
J mendels Spring 2015 collection

J. Mendel Spring 2015

Love love love this dress. To DIY it grab some black, yellow and white fabric paint and some paint brushes. Create diagonal strokes with the different colours. Try it on a skirt or shirt.
 
NYFW Stree Style
I like how delicate and feminine the lace makes this outfit look. Take a maxi dress cutting out the sides of material, replace the cut out with lace by either sewing or gluing with fabric glue.
 

DKNY Spring/ Summer 2015

DKNY Spring/Summer 2015

Mesh is no longer just for the gym. For a sporty-sexy look get a bunch of mesh fabric and overlay it on a mini skirt that’s either stretchy or has a zipper. Sew the mesh along the sides and to the top of the skirt, like this DIY.
 
Thom Browne 2015

Thom Browne Spring 2015

To get this look simply get a badminton racket (because they are smaller and lighter than tennis rackets) and a headband. Cut the head band tying each end to the side of the racket and wear on your face. LOL I’m totally kidding but if you want to give this a go please make sure to send me a lot of pictures, or at least tag me on Instagram at @outsidethecloth.
 
Do you have any favorite collections or looks from 2014 NYFW? Let me know in the comments below :).
 
-Shanel


DIY Braided Belt

Featured

Hello!

It’s been a while since I’ve written, but it feels good to be blogging again. During my break I visited New York City, celebrated my birthday and enjoyed the last warm days of summer hanging out with friends. I have to admit I fell out of habit and became unmotivated to write, but I did manage to create some new DIYs and I’m excited to share!

This DIY braided belt is a nice transition back into things because it’s easy to make, and it requires very few supplies. Read on to learn how to make it.

BraidedDIYBelt

Continue reading