
Lately I’ve really been loving the combo of pearls and gold. I’ve always been drawn to gold accessories, I like that pearls add more of a delicate look and a touch of femininity.
I was practicing with crafting wire when I decided to put together this DIY pearl and wire ring. Continue reading to learn how to make it.

The Supplies
Crafting wire I used 20 gauge (.032 inch) wire
Pearls
Scissors
Flat nose pliers
Glue
A thin stick a toothpick will do
A circular item that’s approximately the same size as your finger

The Steps
Cut a 4-inch piece of crafting wire.

Take the end of the wire and wrap it once clockwise around your circular item.

Test that it fits comfortably around your finger. Make adjustments if necessary.

Use the pliers to bend the wire downward.
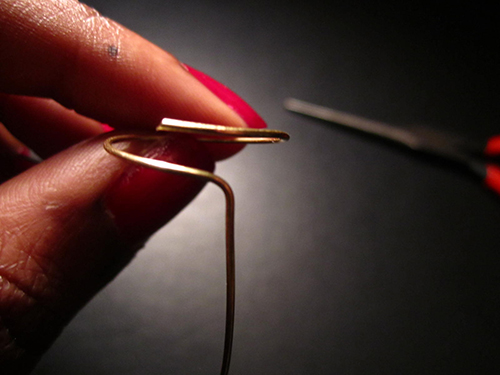
Bend the wire to the right, so you have a 90 degree angle.

Wrap the remaining wire clockwise around the circular item.

Again, test that the ring fits on your finger.
Once you have your desired fit cut the remainder of the wire off.
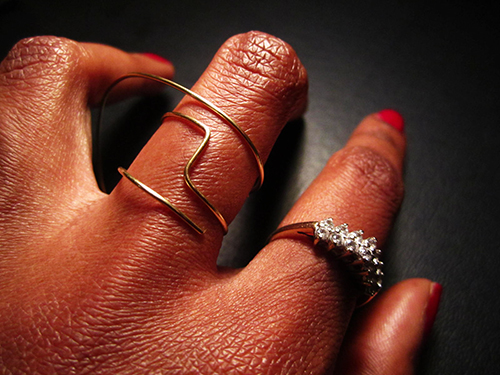
Add a pearl and then a dab of glue. Move the pearl to the end of the ring. Repeat on the opposite end.

Let the glue dry.
All done 🙂

– Shanel

This is so cute! And it looks really easy to make. What kind of metal did you use? I’ve found that the aluminum wire available at craft stores is too soft.
Thank you. Yea it’s pretty easy to make.
I used The Bead Smith Crafting Wire 20 gauge I believe it’s copper. It’s pretty durable and holds shapes very well.
Thanks for commenting.