
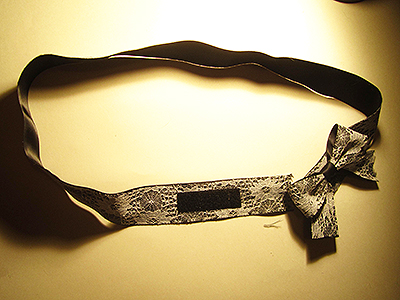
I’ve recently developed this thing for bows. I feel like they are cute and chic detail that can be added to almost any accessory.
This lace bow belt was really inexpensive to make, and it’s a great accessory to add to your belt collection.
The Supplies
- Solid coloured ribbon
- Lace ribbon
I found both ribbons at the dollar store, but you can also find ribbon at any fabric store, Walmart, Michaels. - Fabric Glue
- Scissors
- Velcro
Dollar store, Walmart, Hardware store. - Needle
- Thread
- Popsicle stick
The Steps
- Take the solid and lace ribbon and line them up. Measure where you would like the belt to fit on your waist and cut. This will be your belt piece.

- Line up and cut another 10 inch piece of both ribbons. This will be your bow piece.
- Glue together the ribbons for your bow piece first. Put a thin line of glue on the top half of solid coloured ribbon and smooth out with the popsicle stick. Glue the lace ribbon on top.
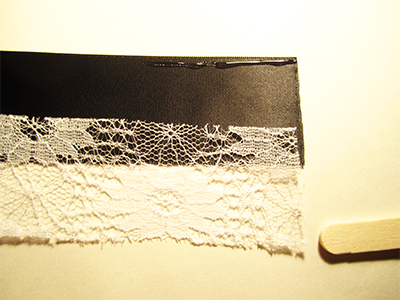
- Glue the bottom half of the lace to the solid coloured ribbon.
- Repeat the gluing steps for the belt piece.
- Wrap the bow piece lace side up over your fingers so that it makes an X.
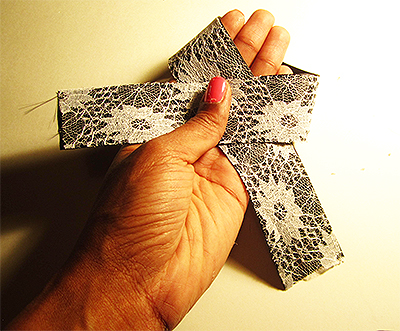
- Scrunch the middle of the bow piece with your fingers. Adjust the ends of the ribbon so that your bow is even.
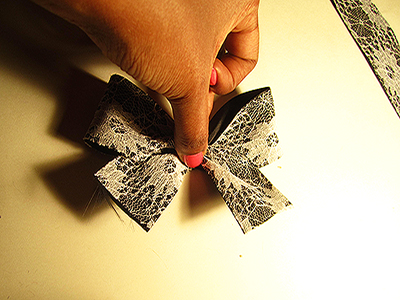
- Thread the needle and tie a knot at the end.
- Push the needle through the middle of the bow and wrap the remaining thread around the middle 4 or 5 times.
- Wrap the thread around the needle and push it through once more to create a knot. Cut the thread.
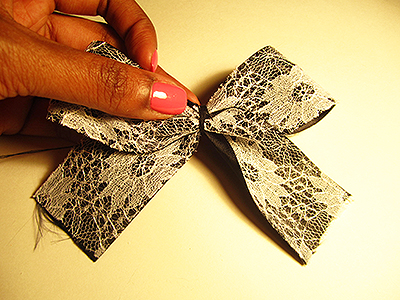
- Cut a 4 inch piece of the solid colored ribbon. Make the piece thinner by cutting it in half.
- Take the 4 inch piece of ribbon and wrap it around the middle of the bow. Glue or sew it around the middle so that there is an extra flap of ribbon at the back.

- Fold the extra flap of ribbon and glue it to the back of the bow.
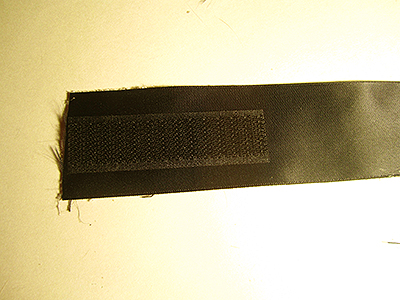
- Glue a piece of velcro on the end of the lace side of the belt piece.
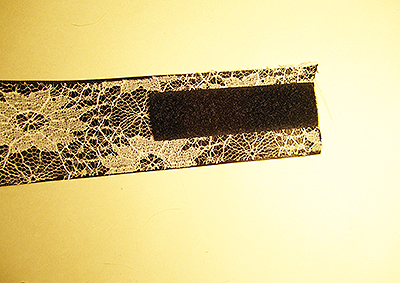
- Glue a 2nd piece of velcro (make sure this piece sticks to the velcro you’ve already glued down) on the opposite end of the belt piece on the solid coloured side of the ribbon.
- Add glue to the back of the bow. Glue it on the lace side of the ribbon (this will be the same end that has the velcro on the solid side).
- Let everything dry.
- Optional tip. If the ribbon has any frayed ends use a lighter to burn them off.
There. You make one pretty package 🙂
P.S Follow me on Instagram Outsidethecloth

Awesome!! I can’t wait to make one. 🙂